Example of VCP integration in LabVIEW
![]()
1. Introduction
In this tutorial, we present a simple model for integrating data from Dracal's USB sensors communicating via the COM protocol. If you've just purchased your first Dracal VCP product, please consult the VCP start-up documentation before you begin integrating your data in LabVIEW.
2. Prerequisites
- Own a Dracal instrument whose model begins with the prefix “VCP-” (as opposed to the basic model which is “USB-”).
- Have converted the instrument to COM communication mode. For further information, please refer to point 3 of the above documentation for your operating system.
- LabVIEW
- Have identified the identifier of your sensor(s). For help with this step, please refer to point 4 of the above documentation for your operating system.
3. Our installation
This tutorial is based on a precision all-in-one air pressure, temperature and relative humidity sensor, the VCP-PTH450-CAL. The operating system on which the model has been built is Microsoft Windows 11, and the virtual serial port associated with our sensor is COM3.
4. The model
Downloadable file corresponding to the model below: Dracal_VCP_Example.vi
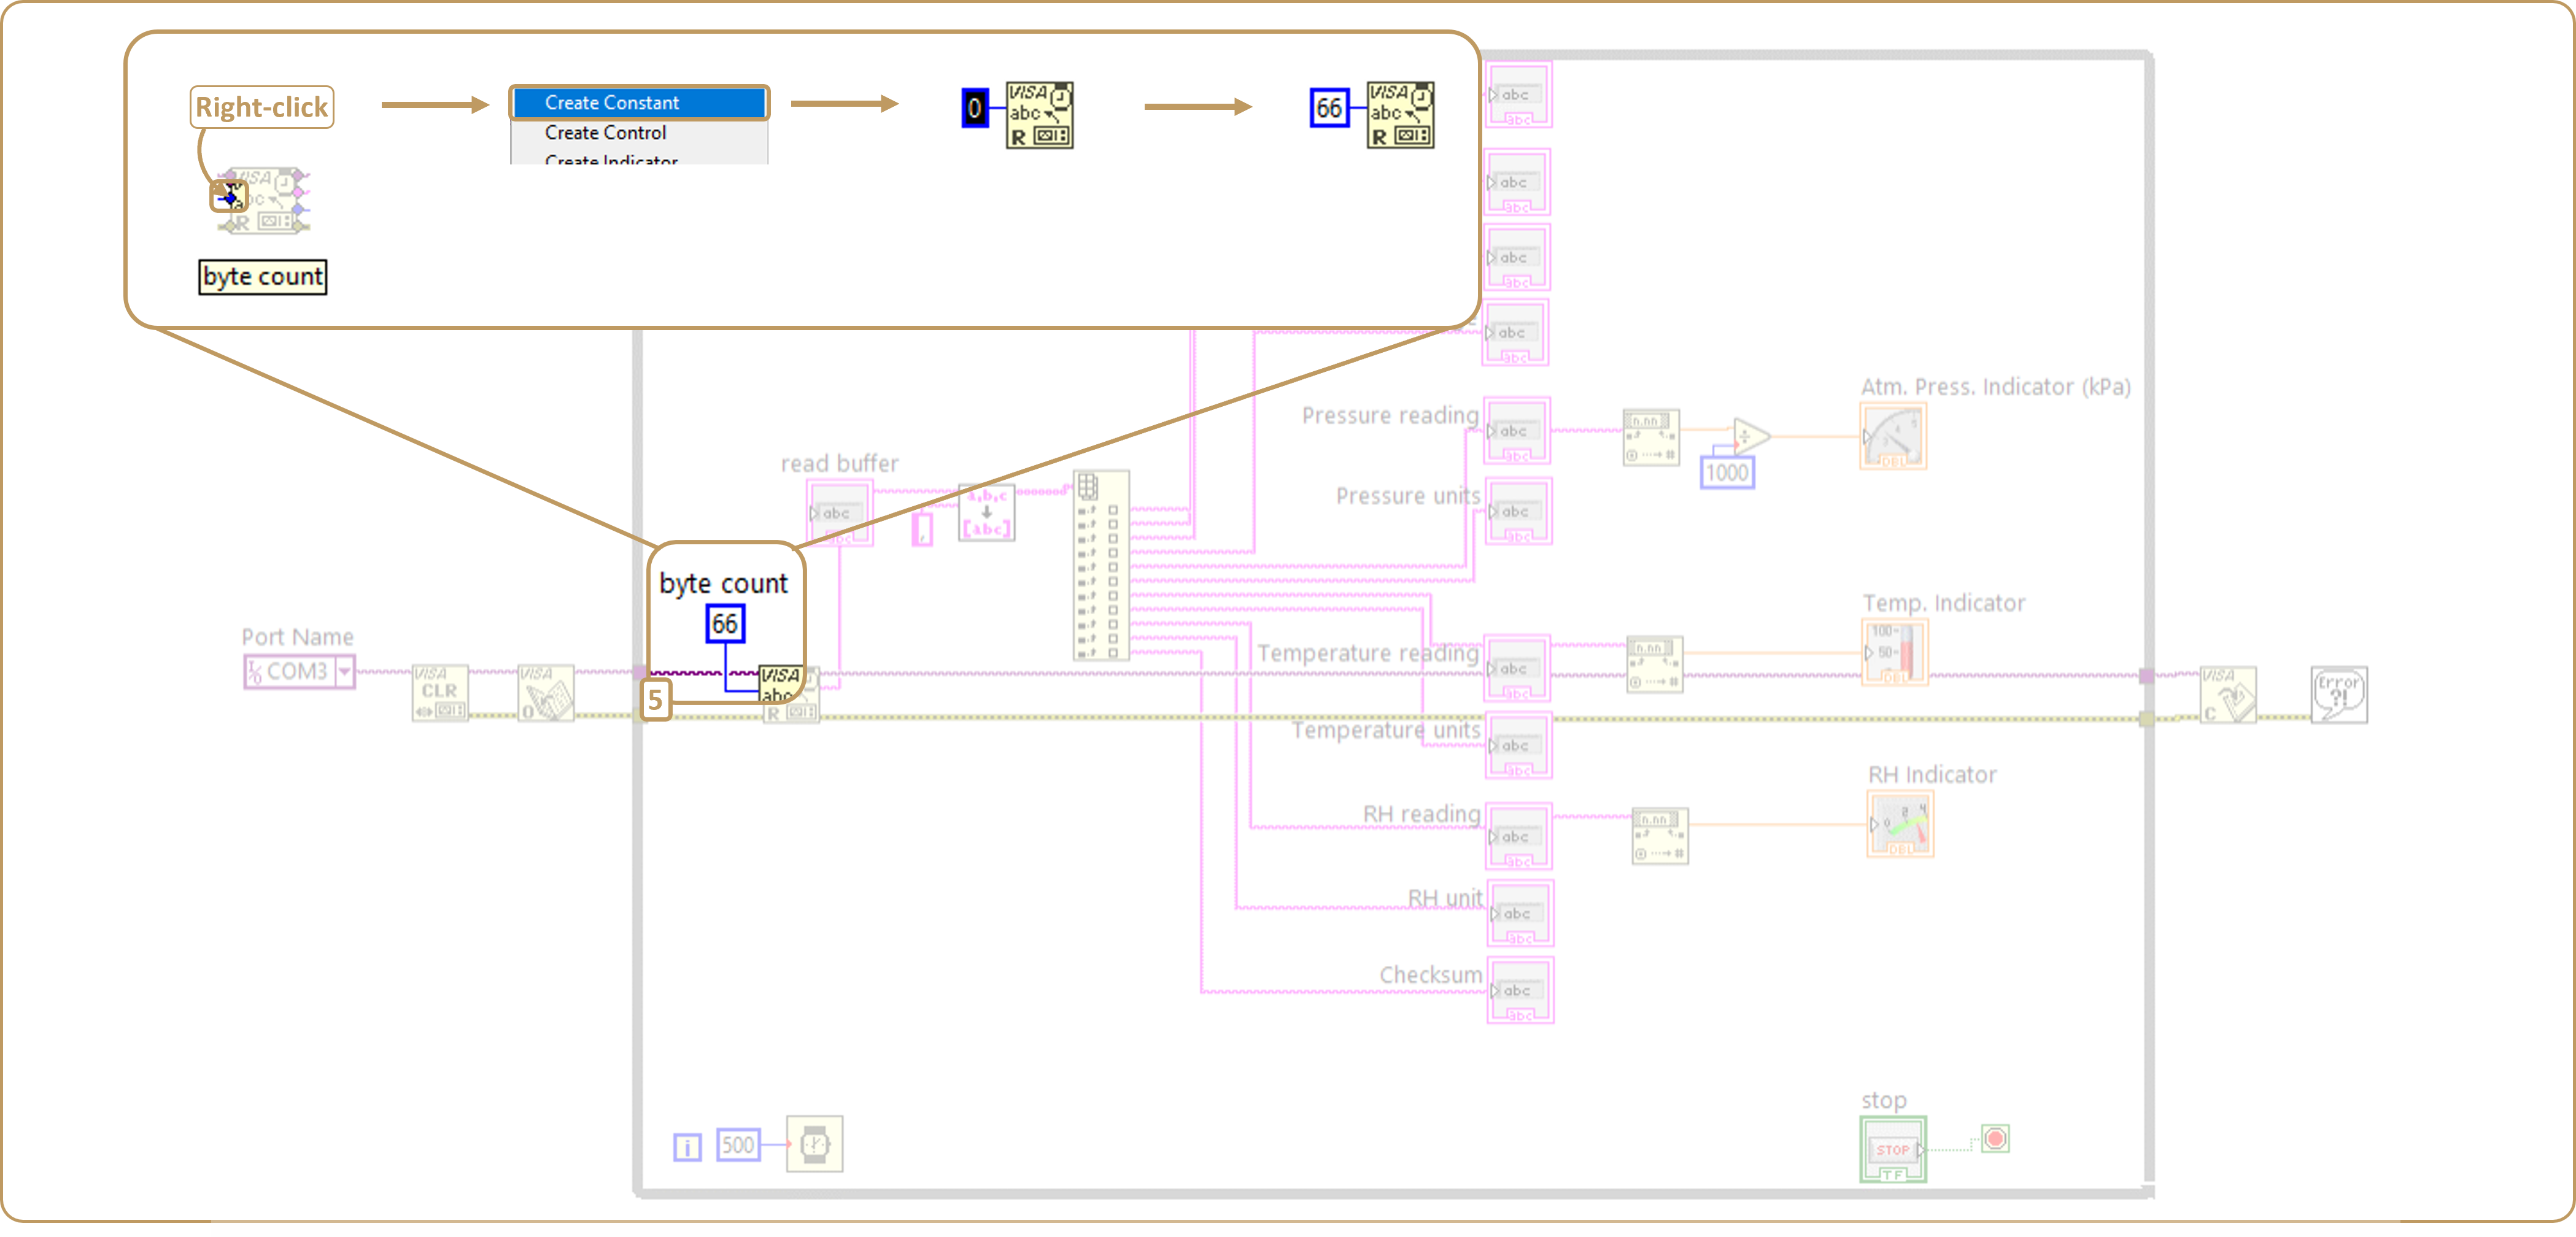
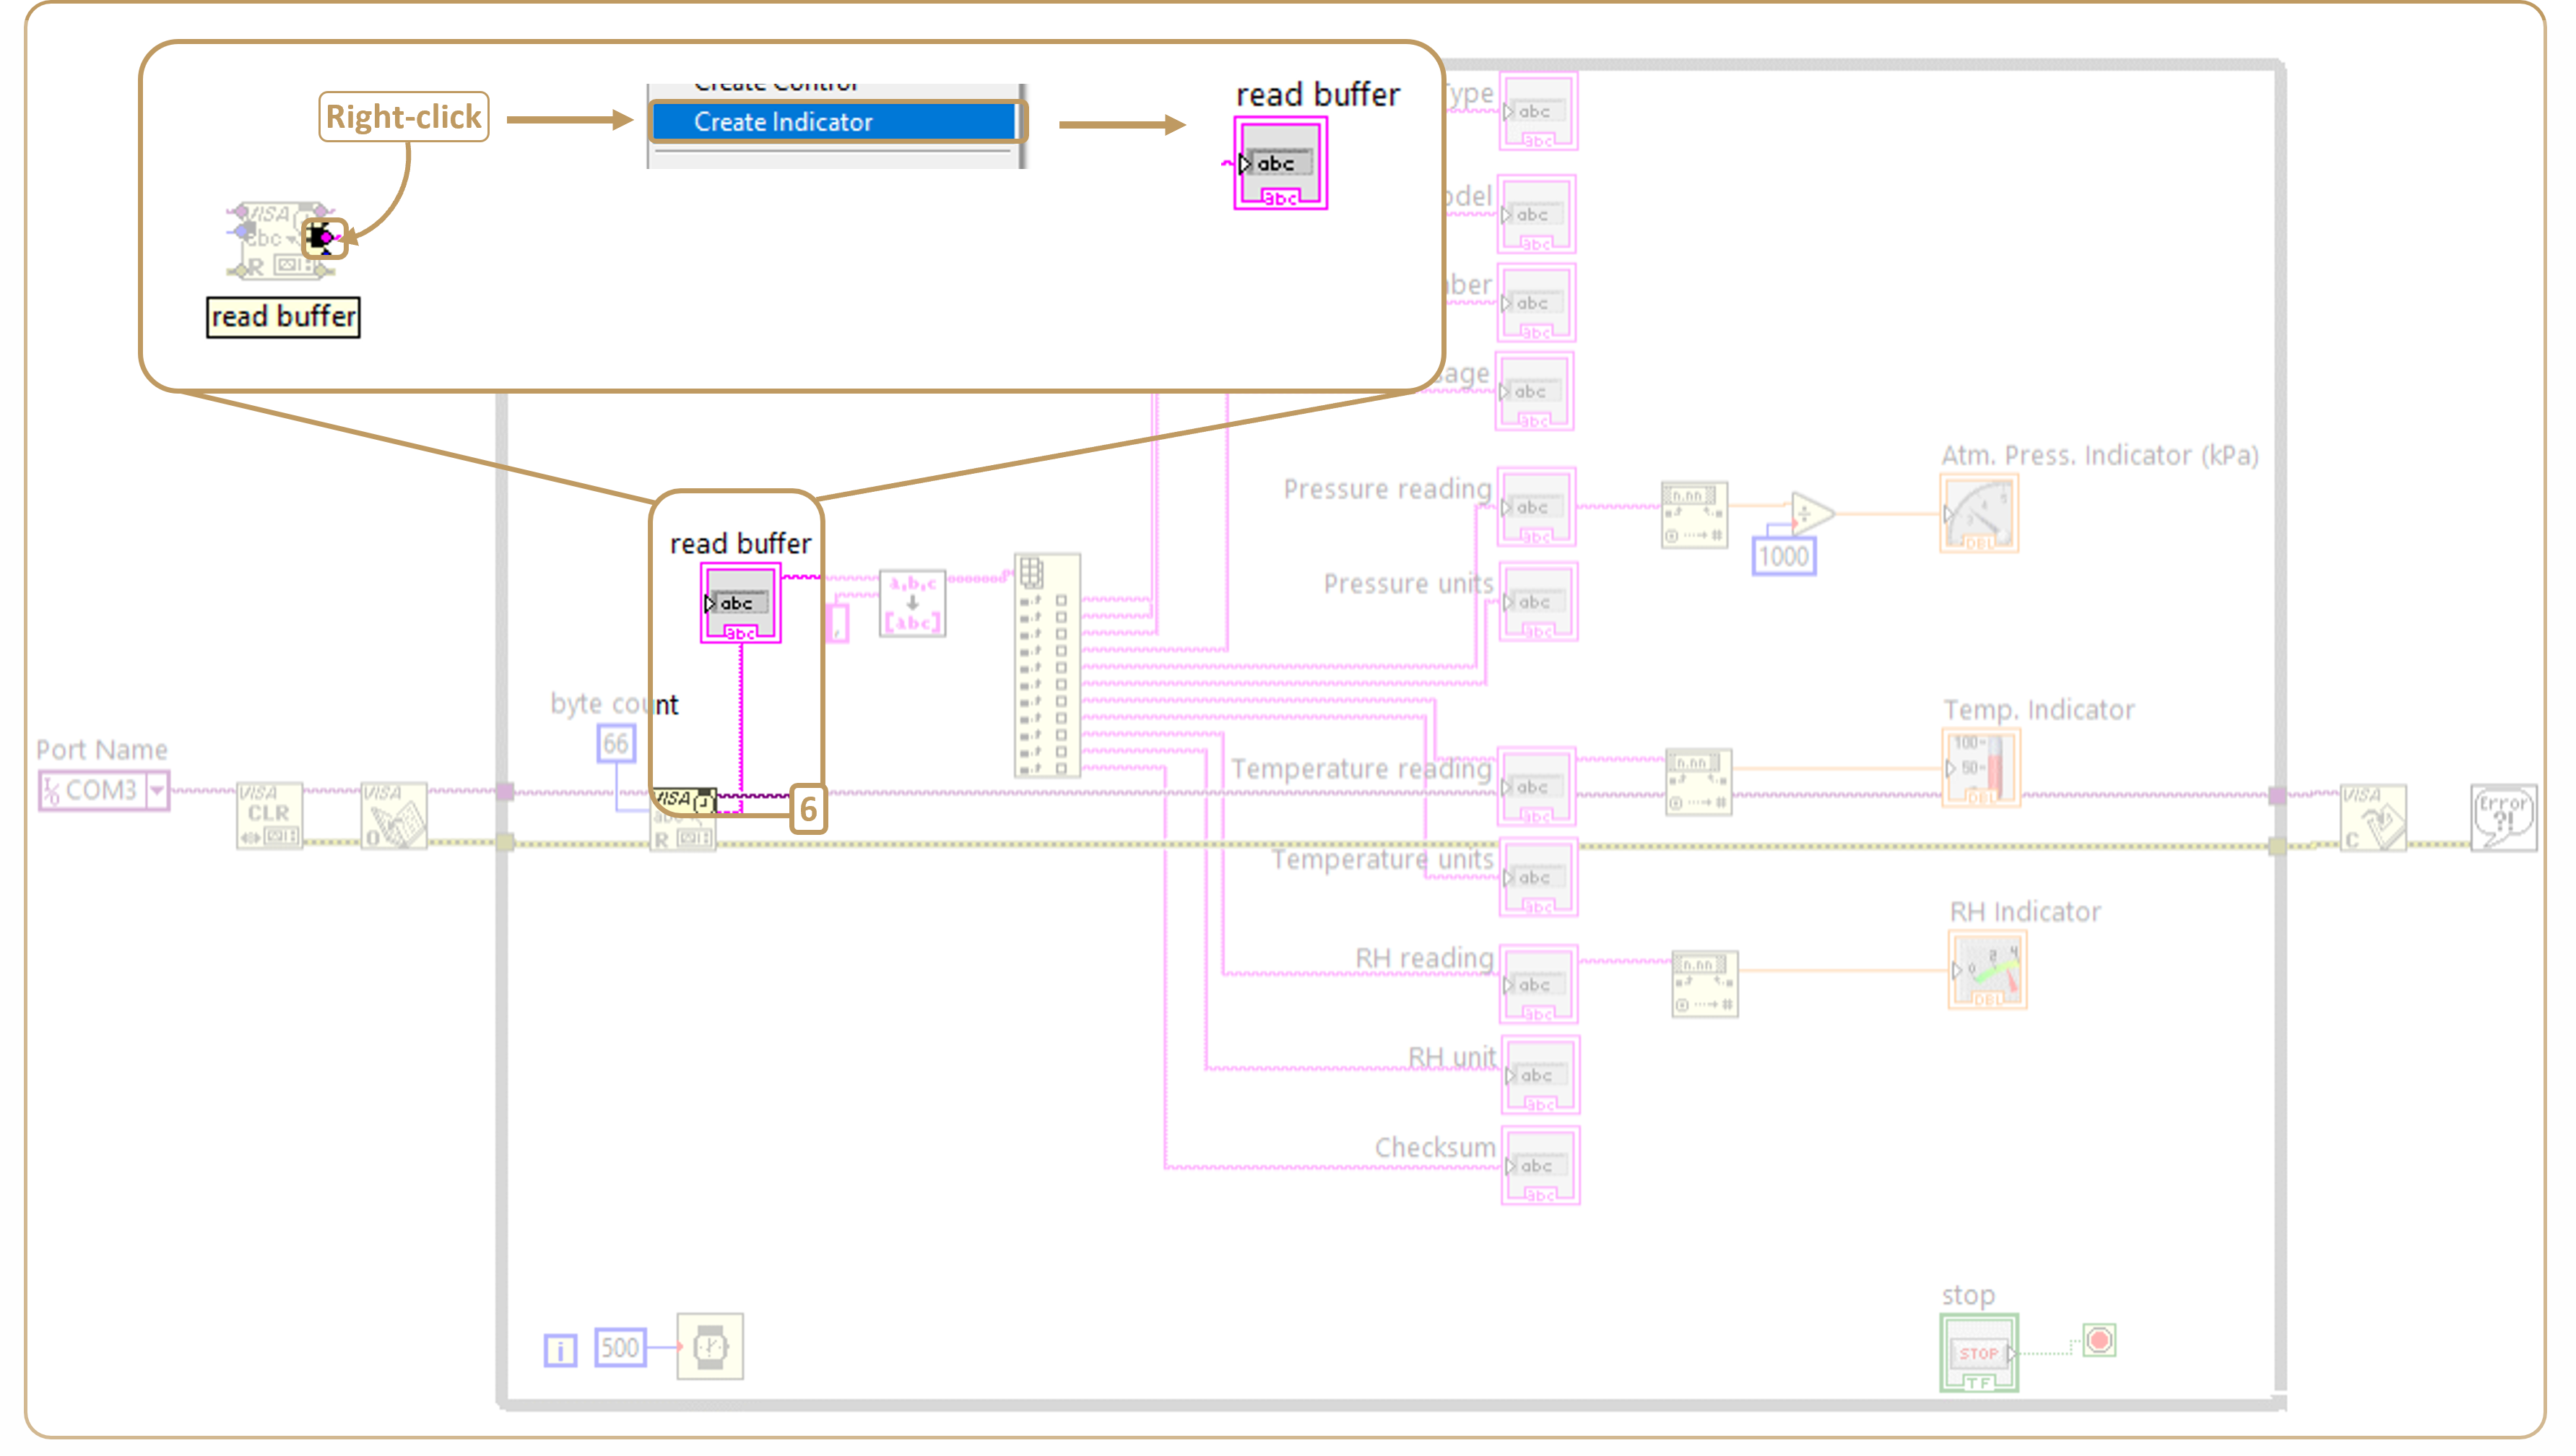
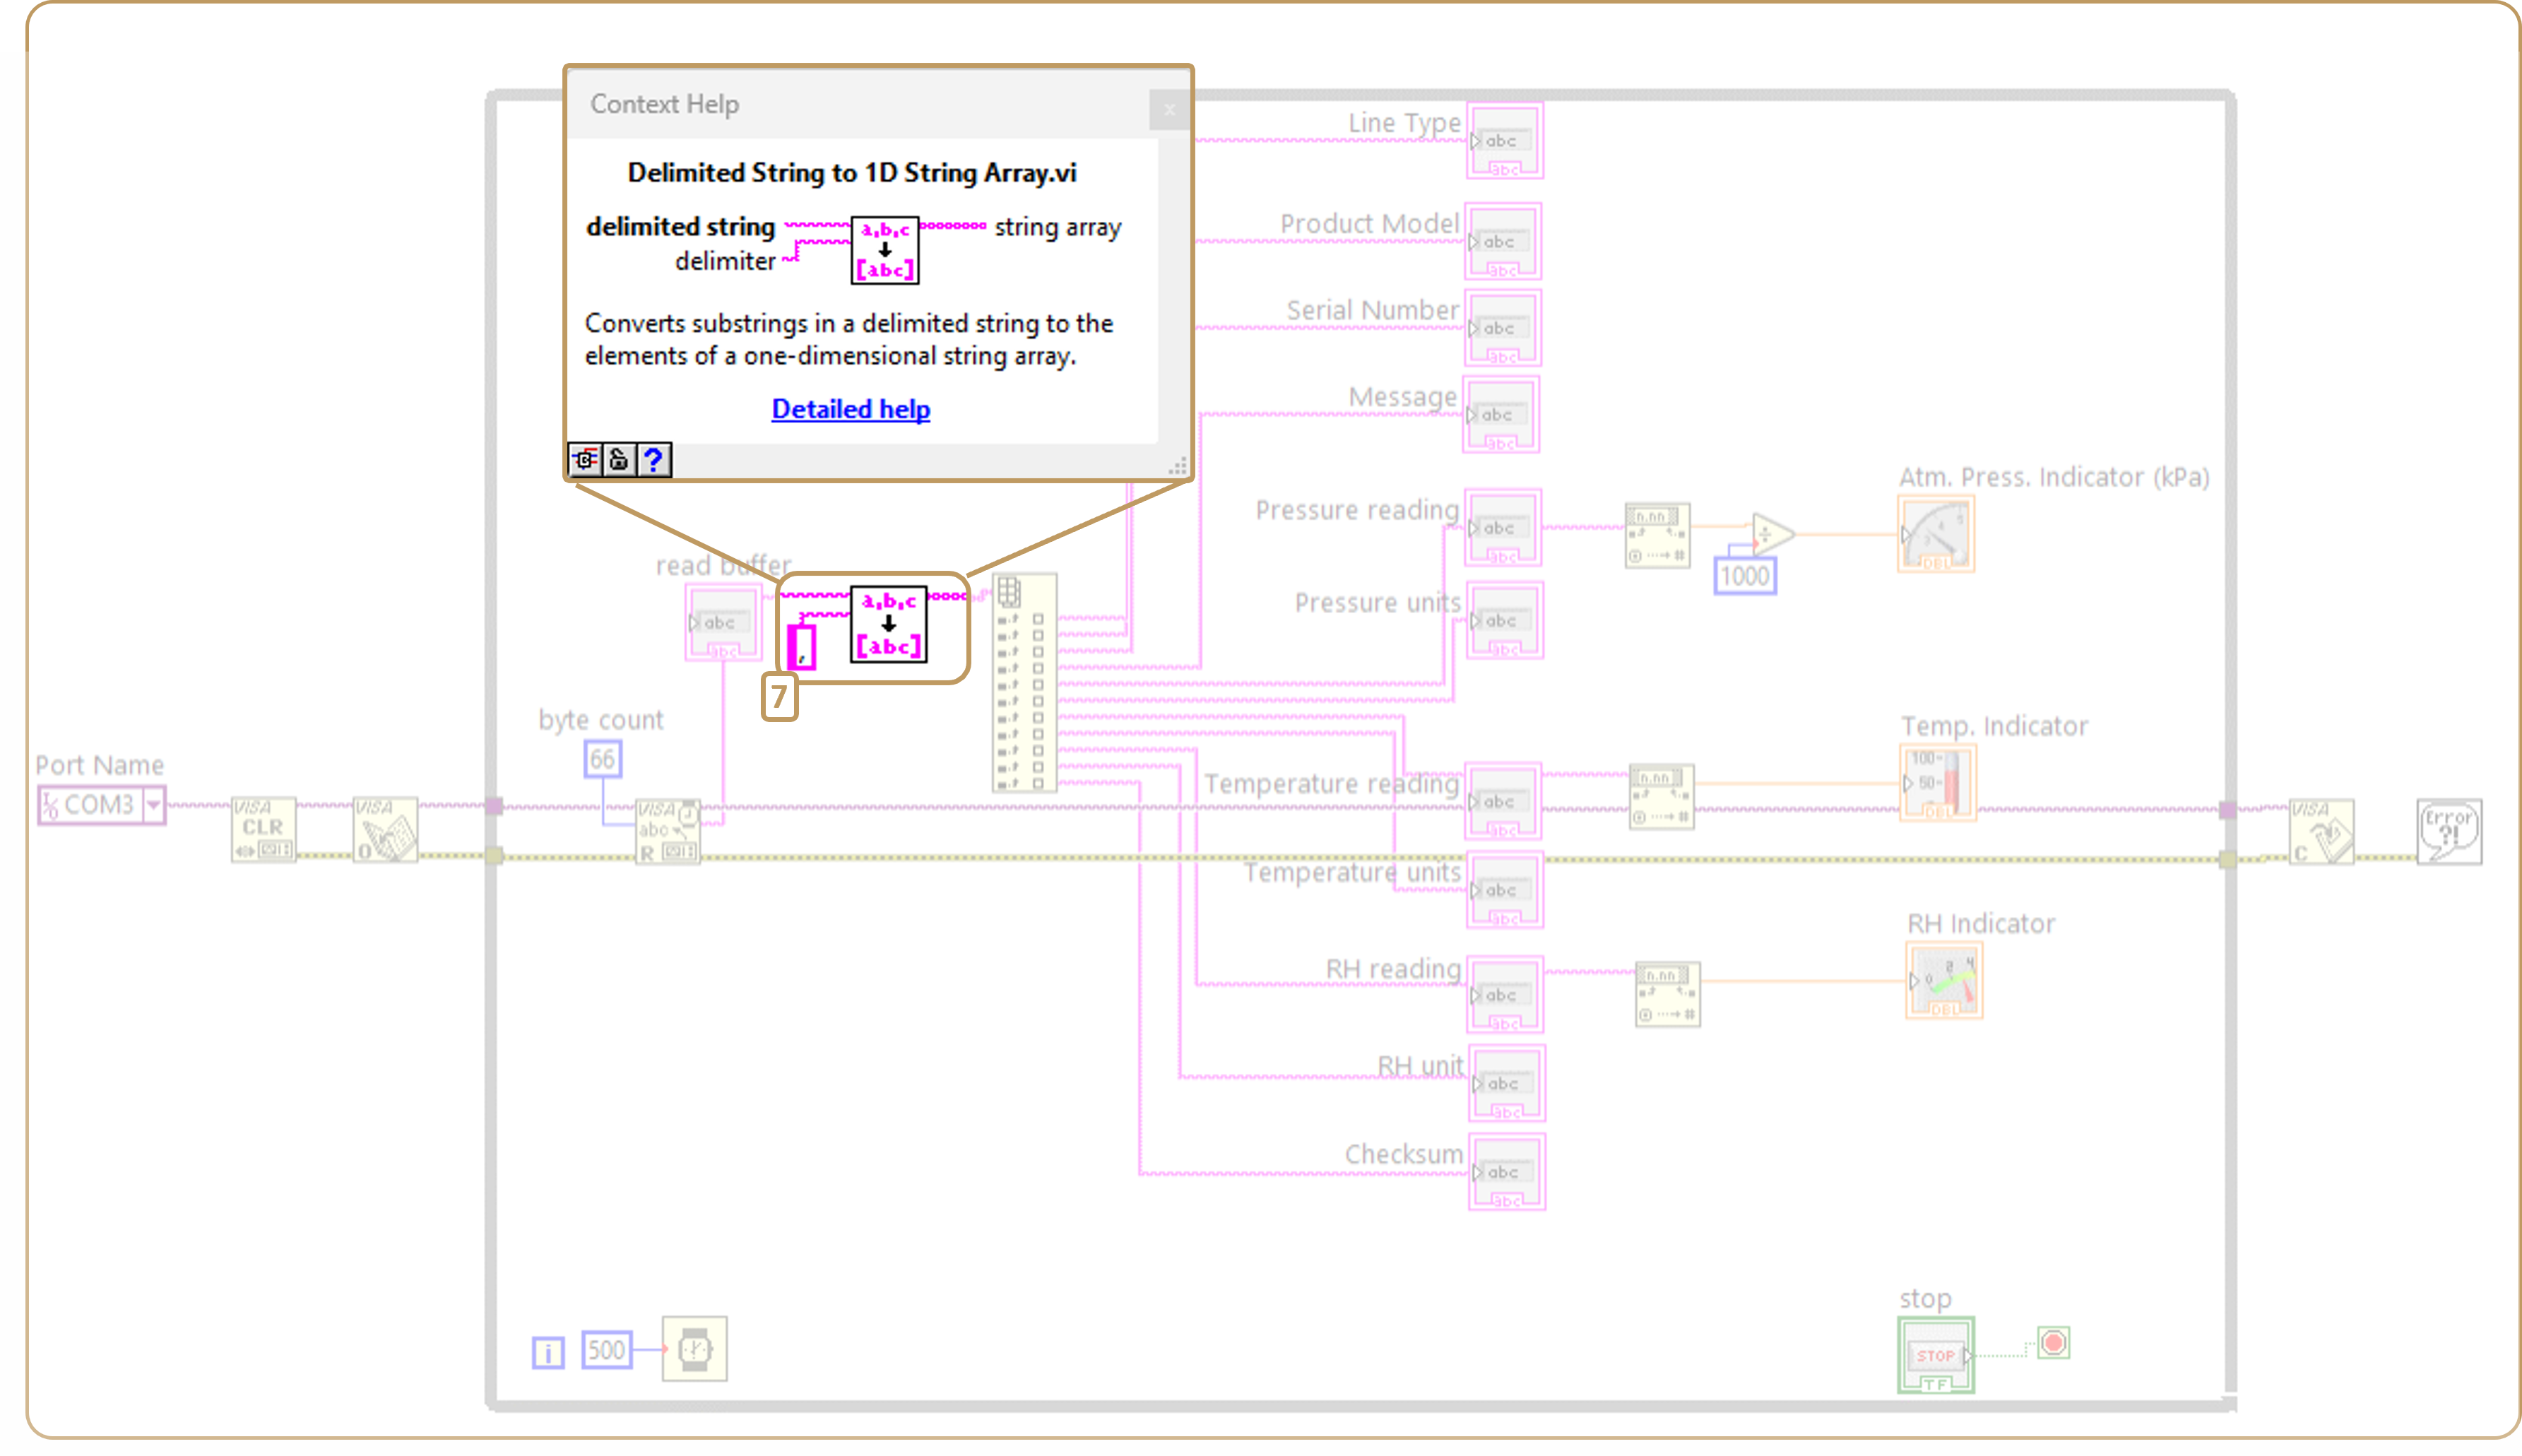
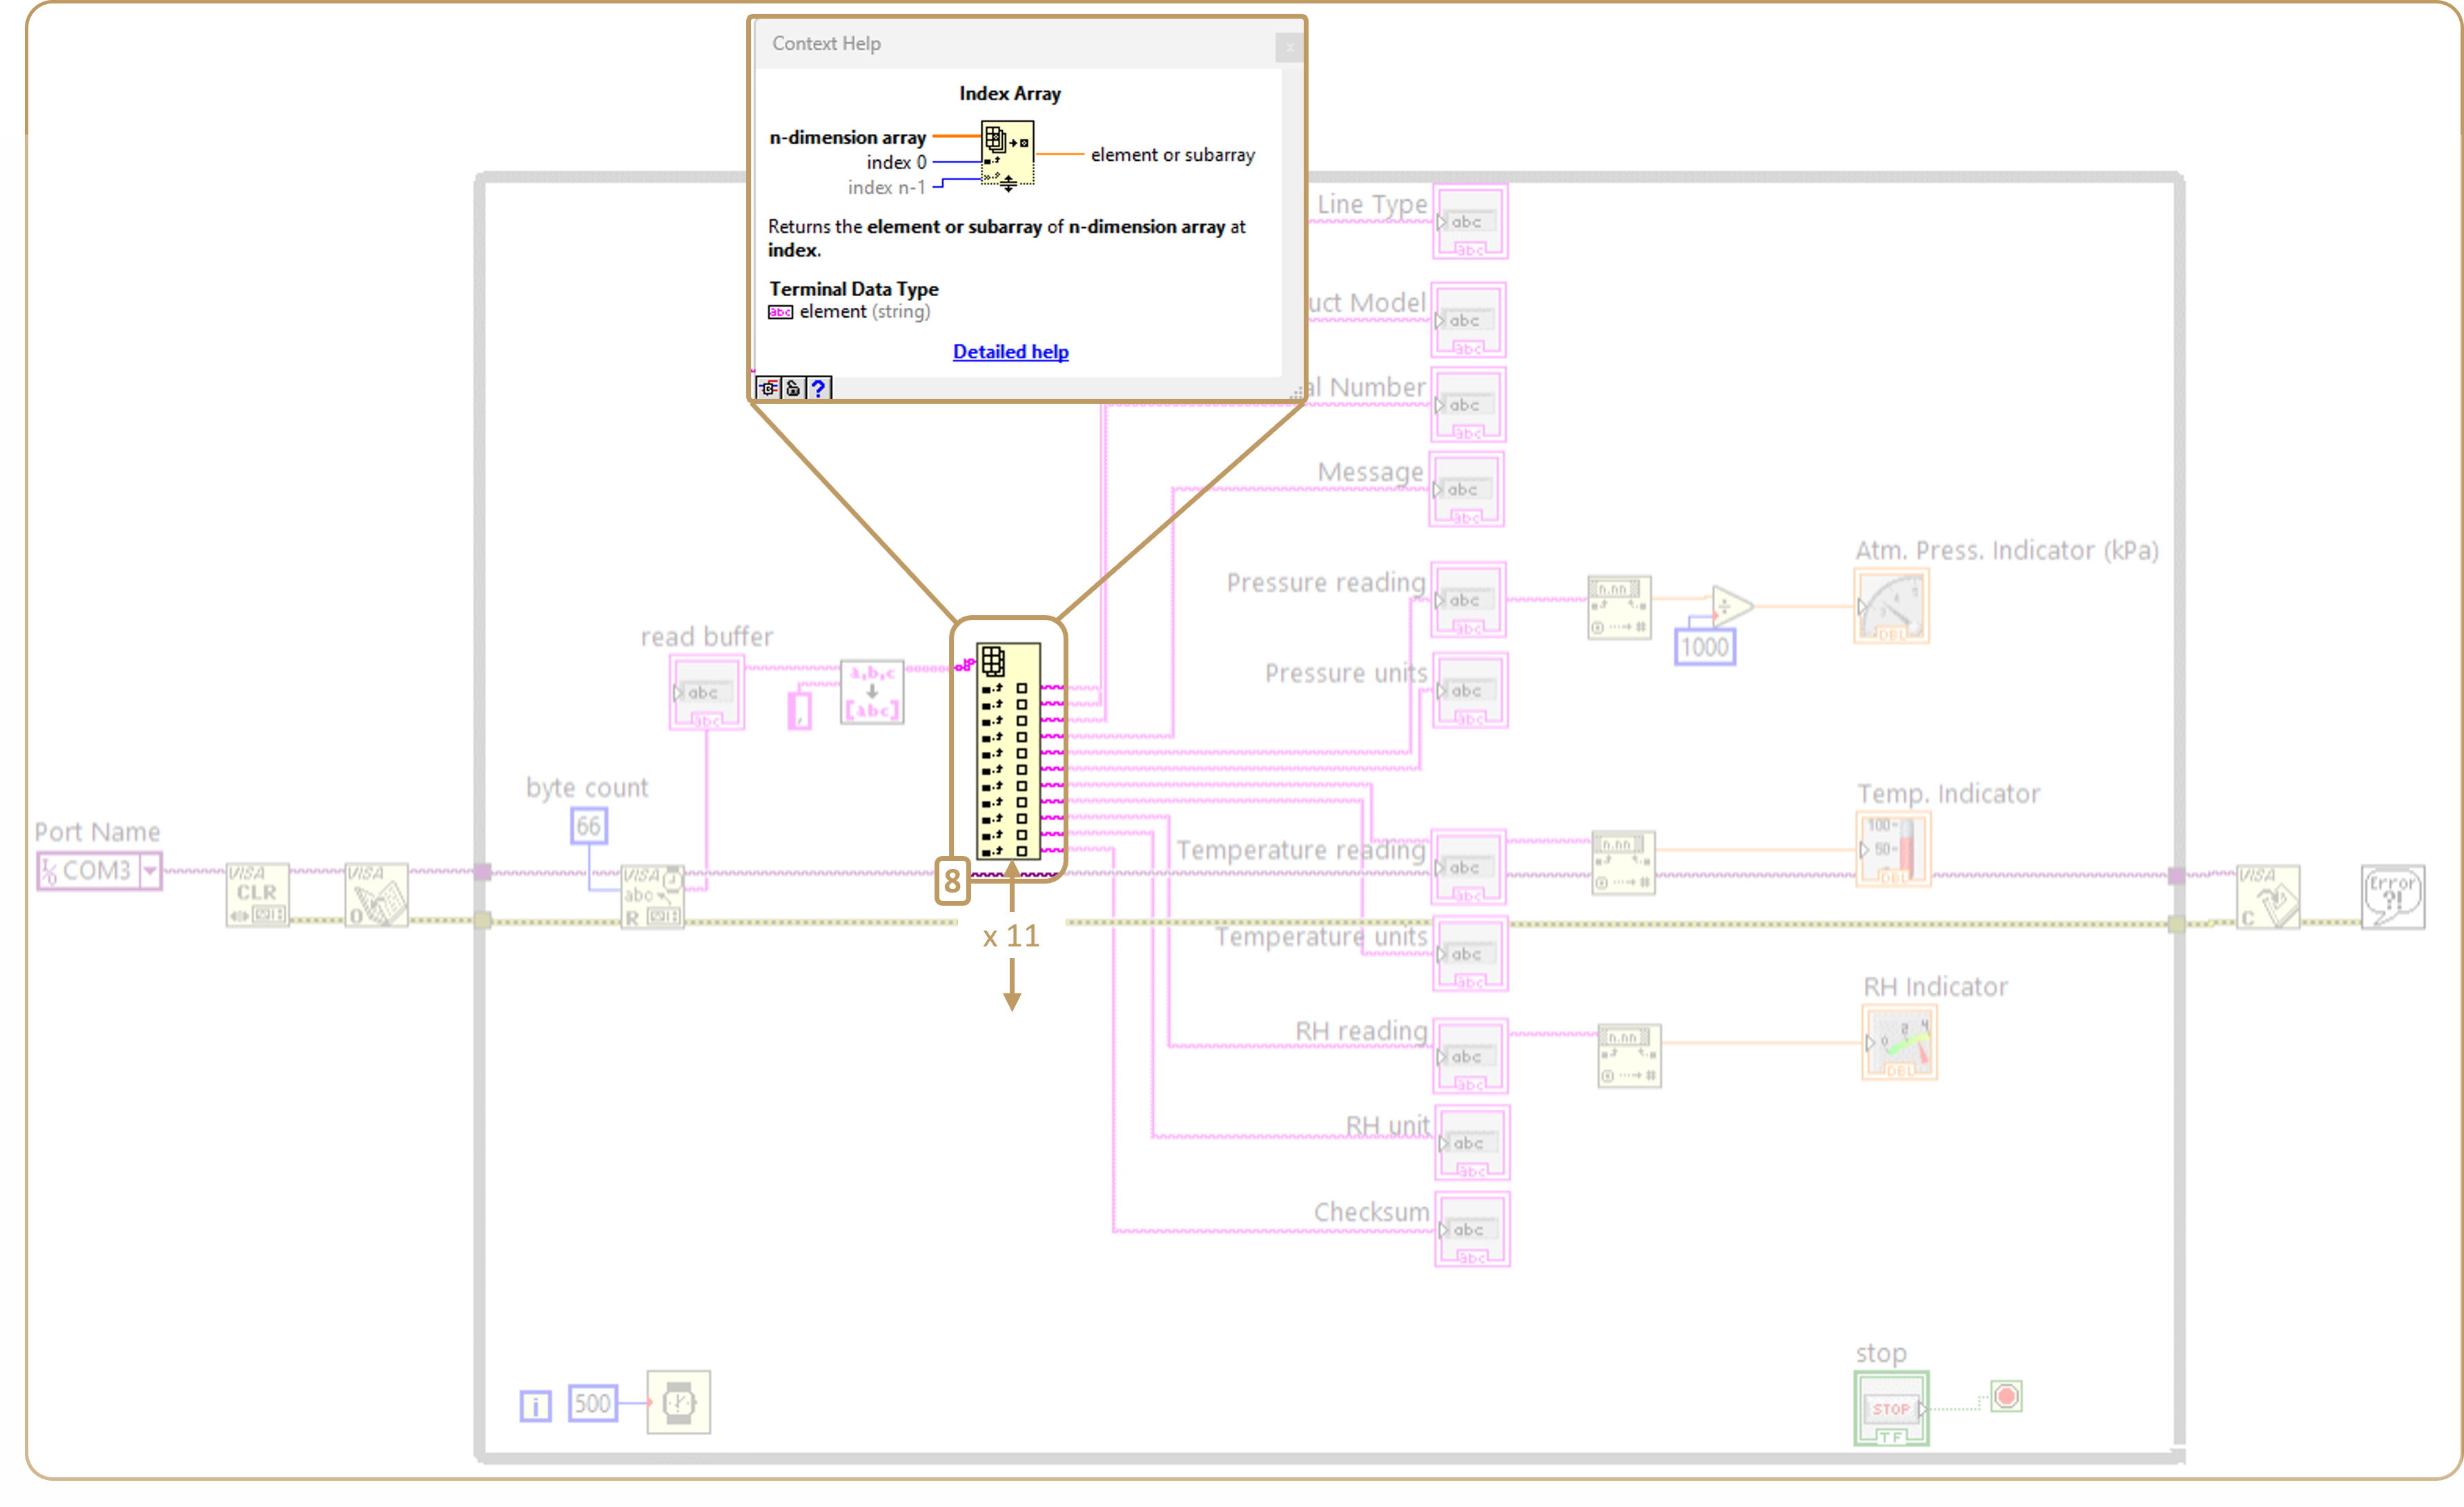
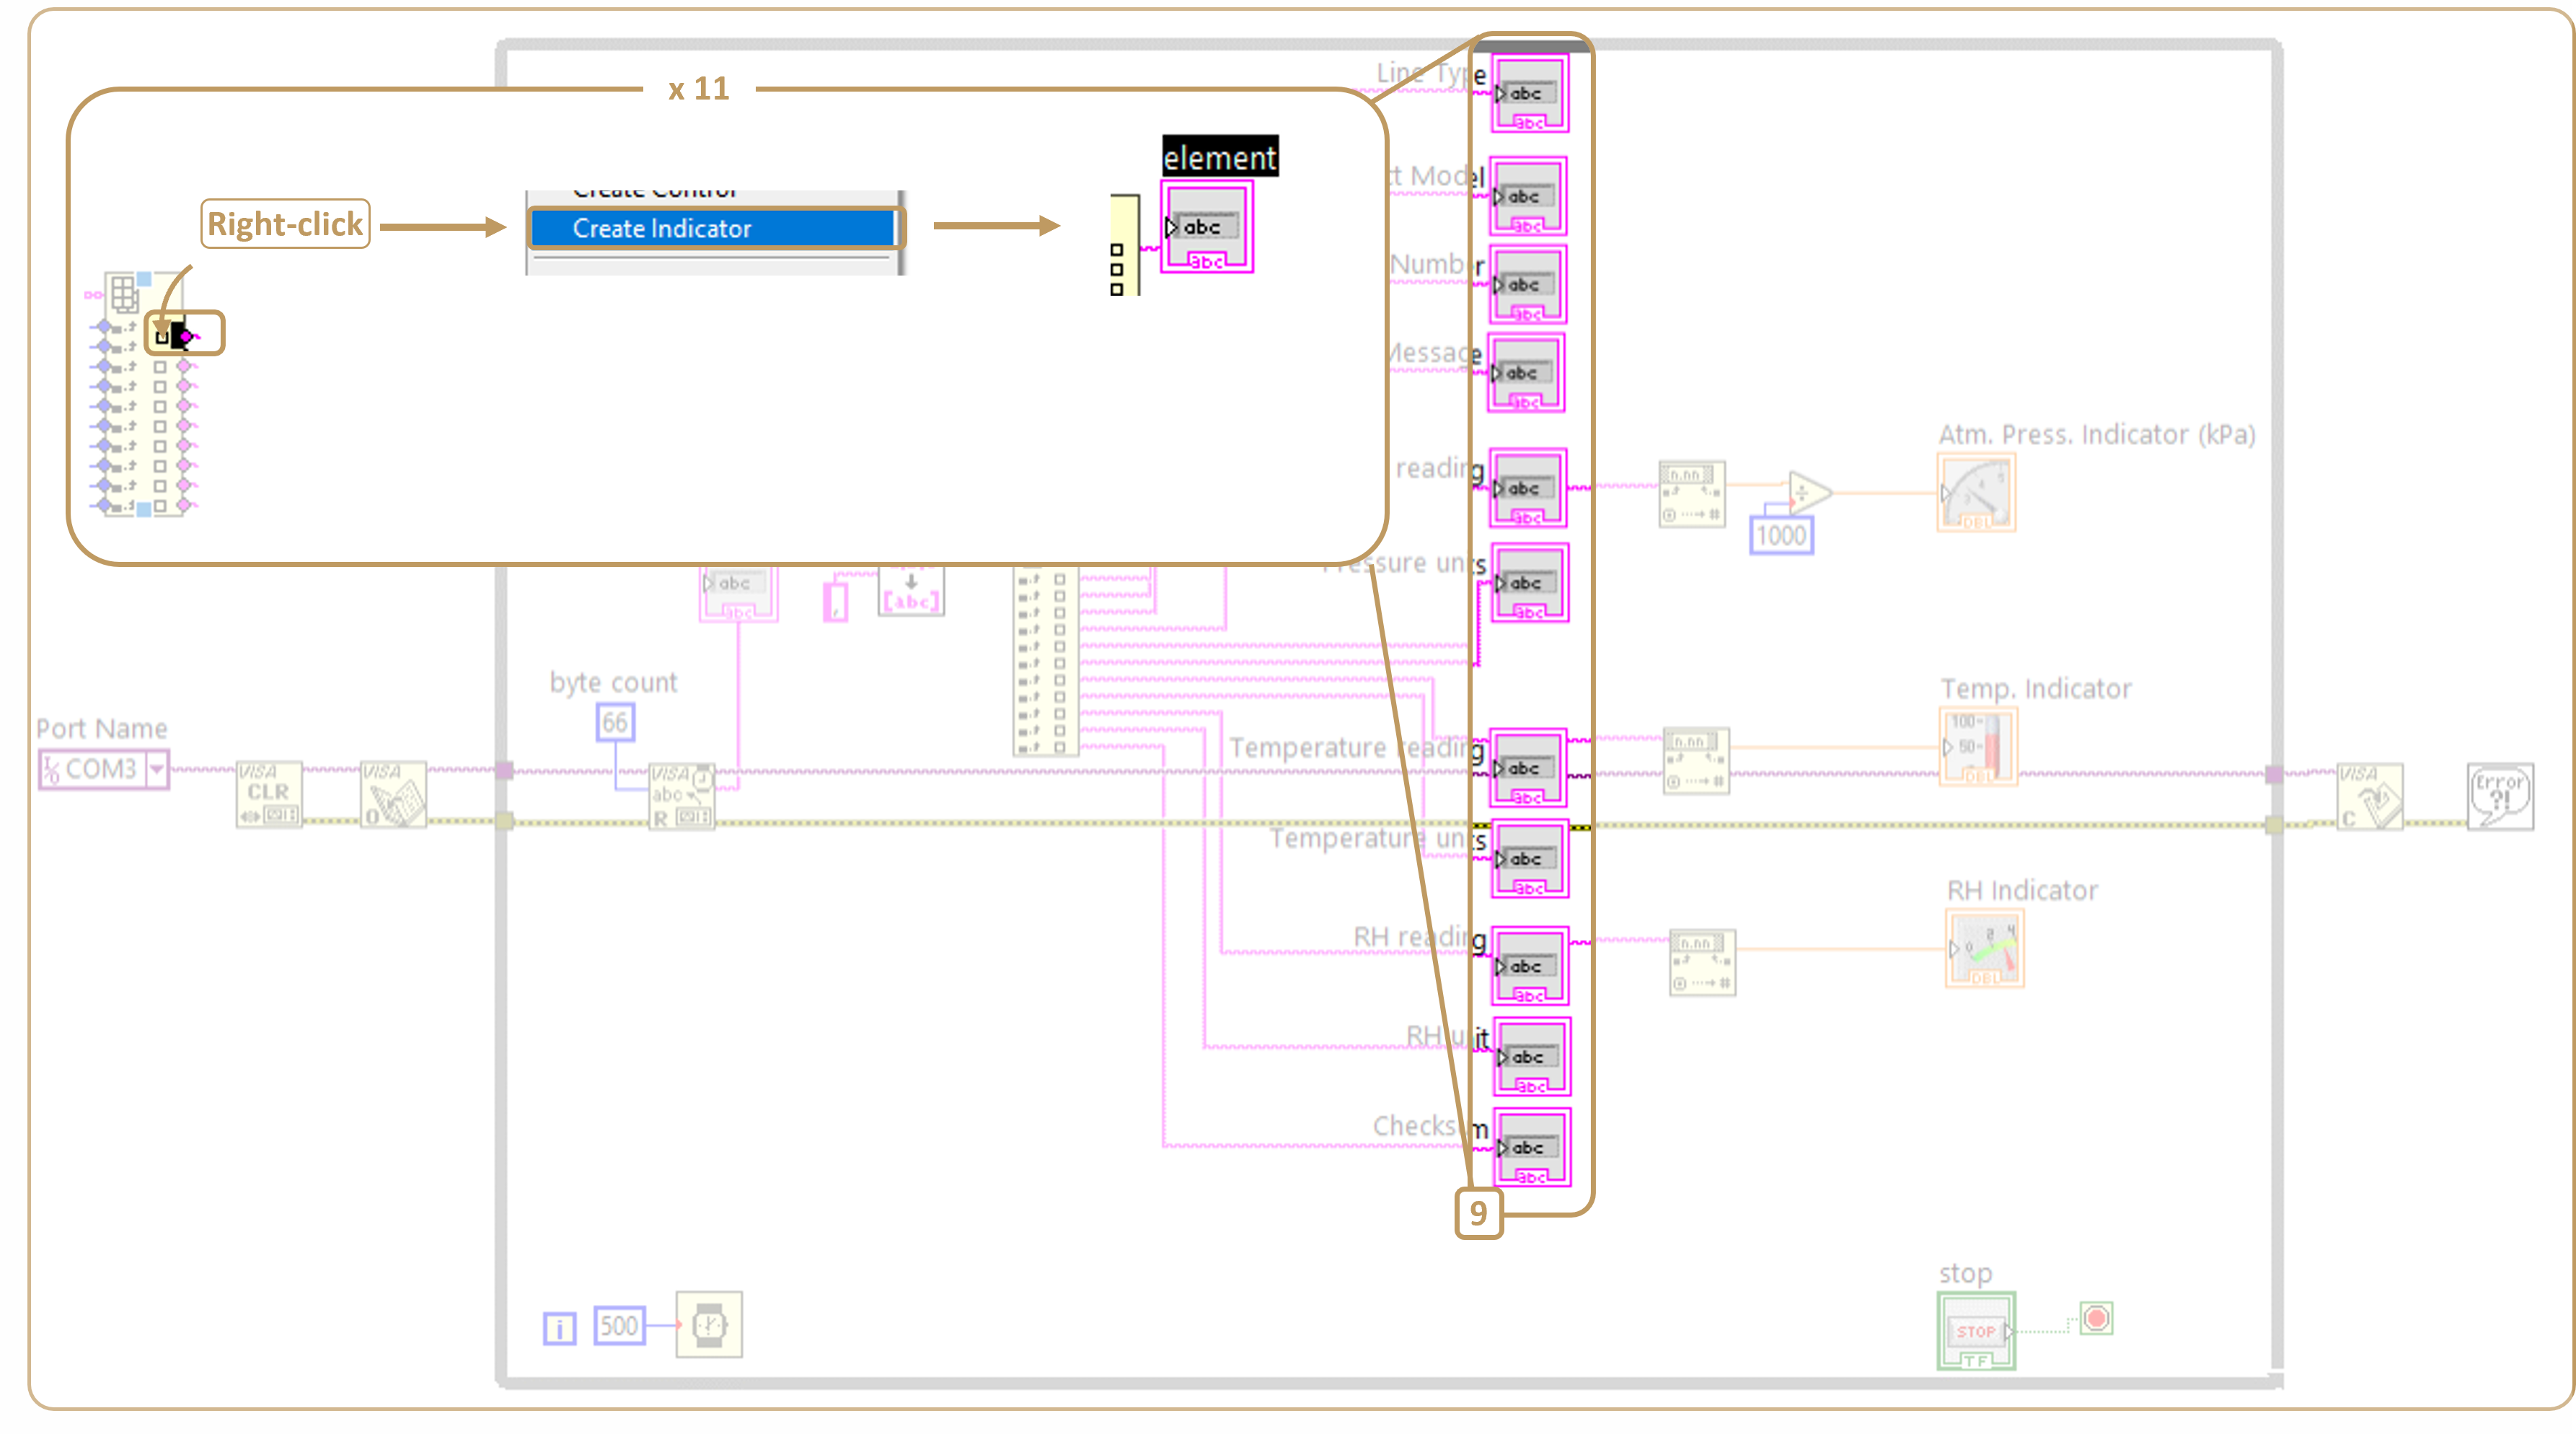
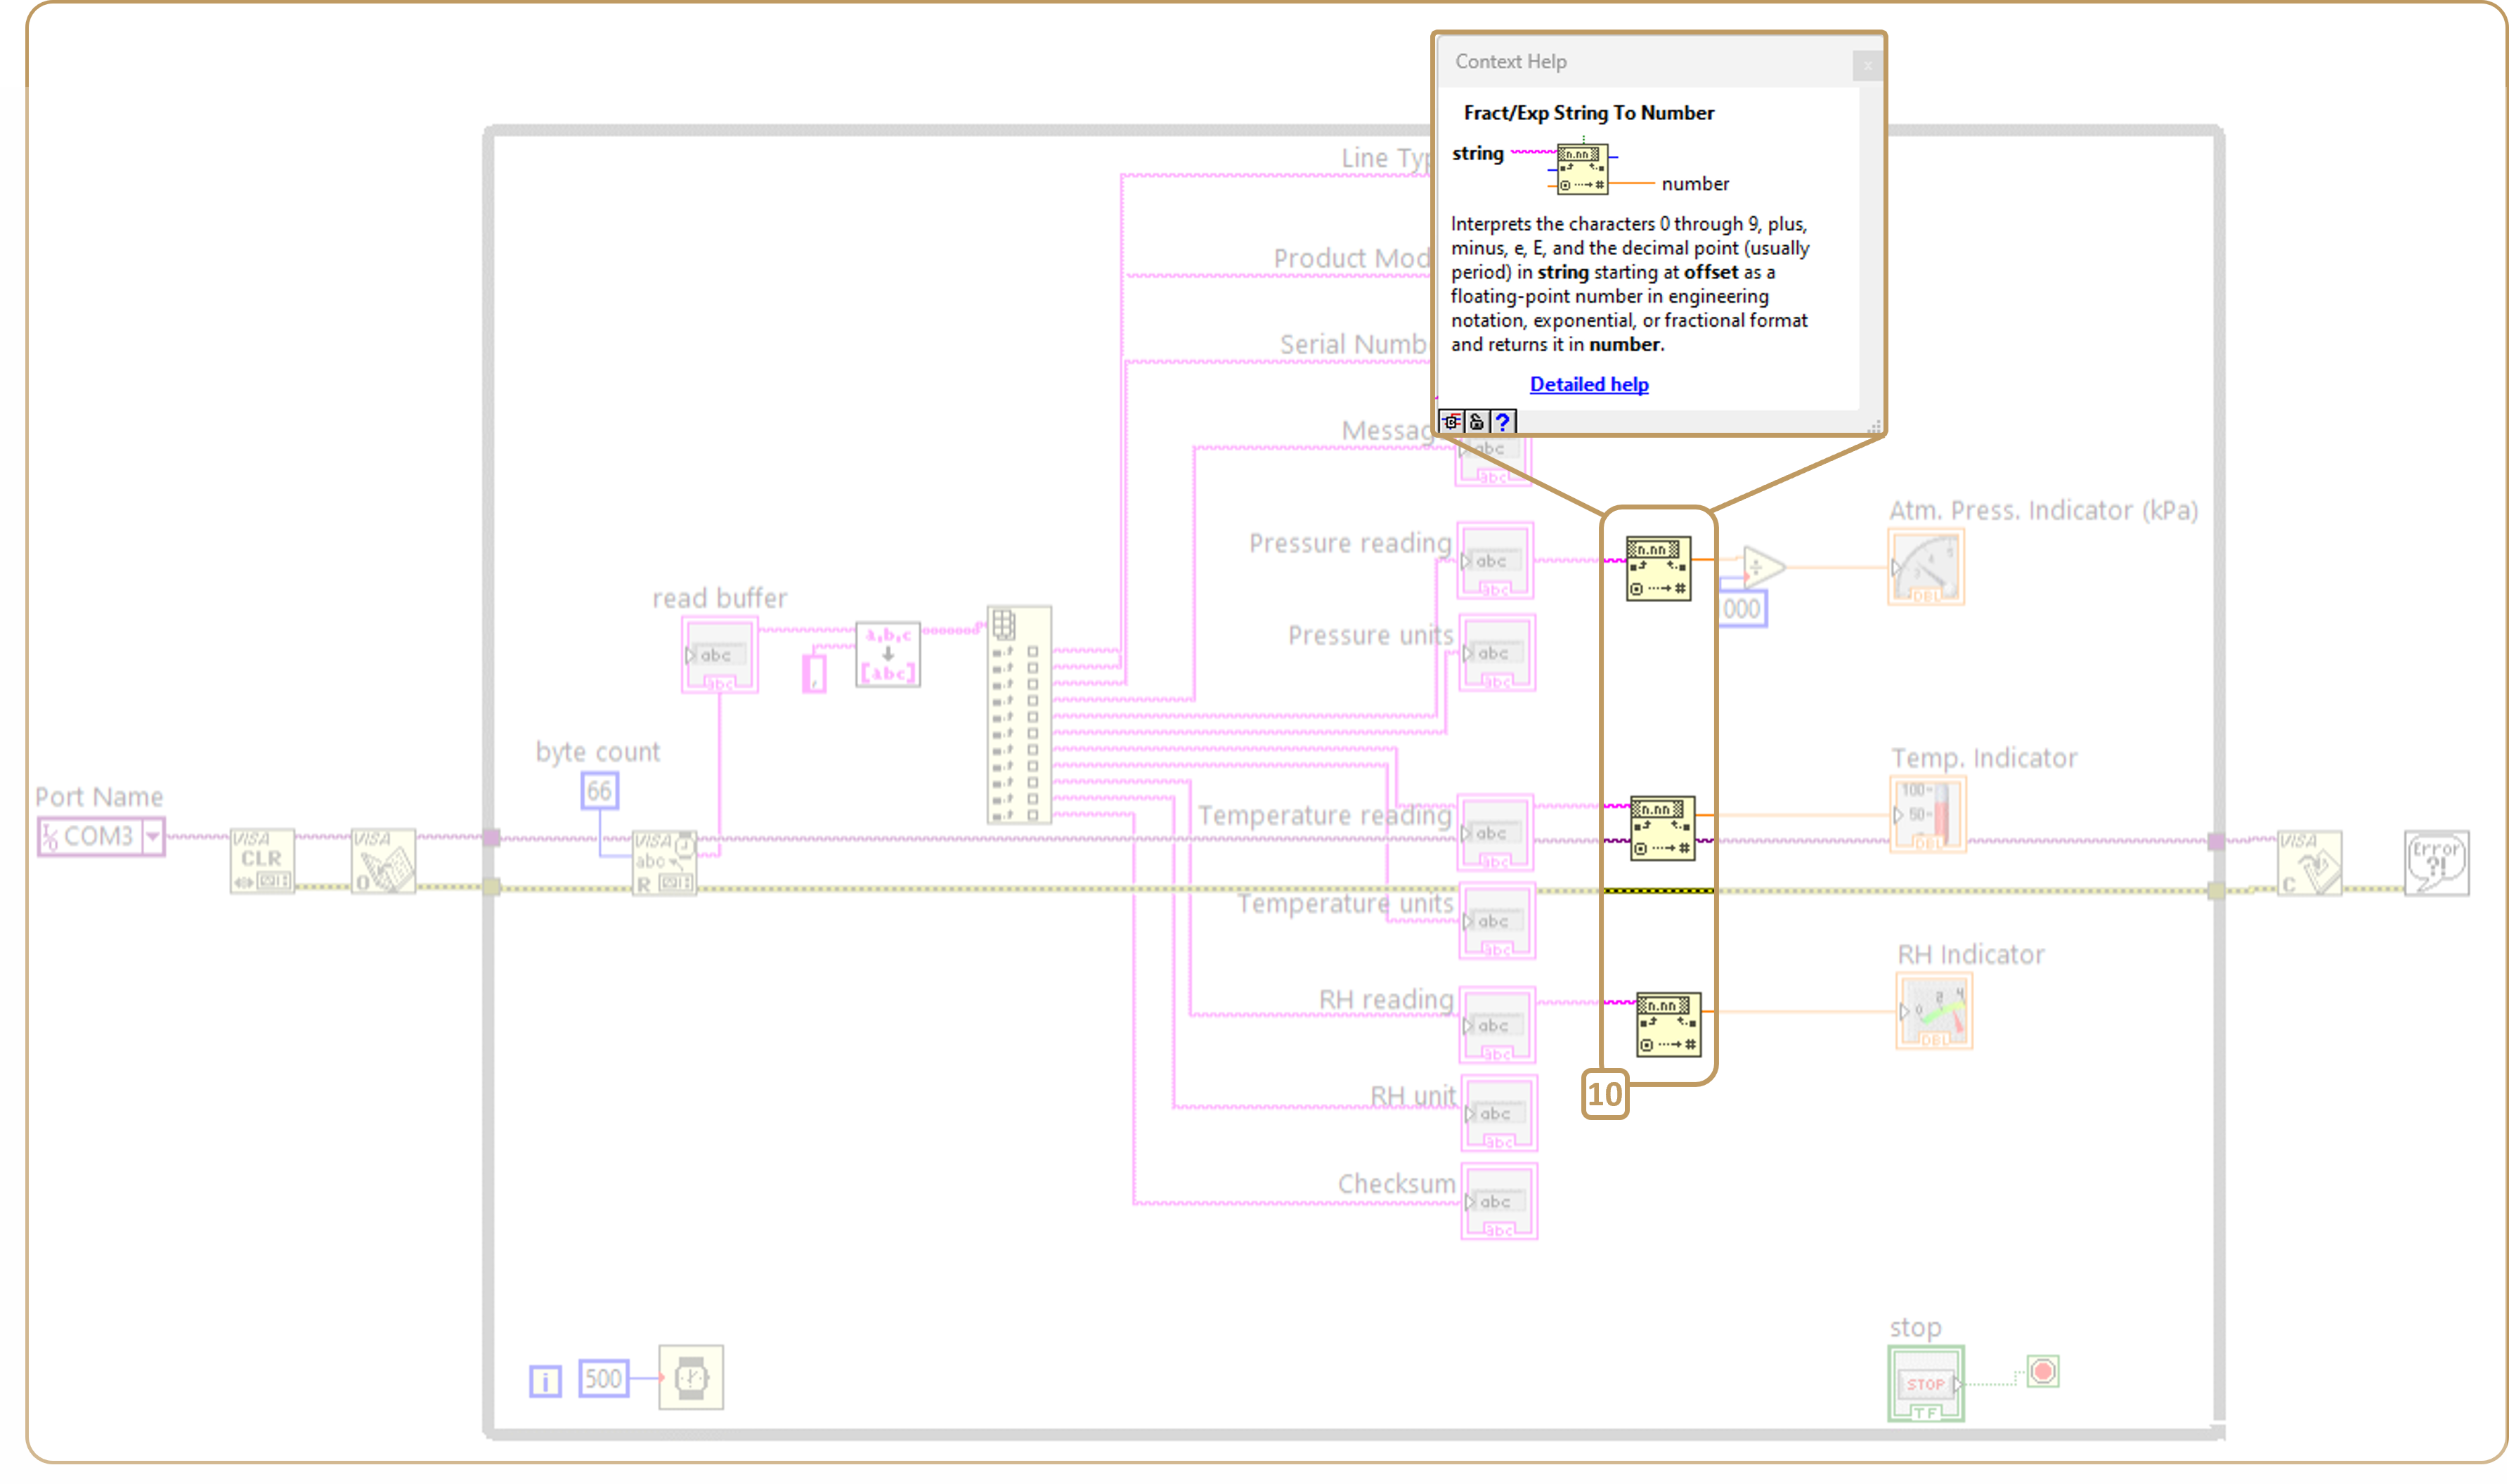
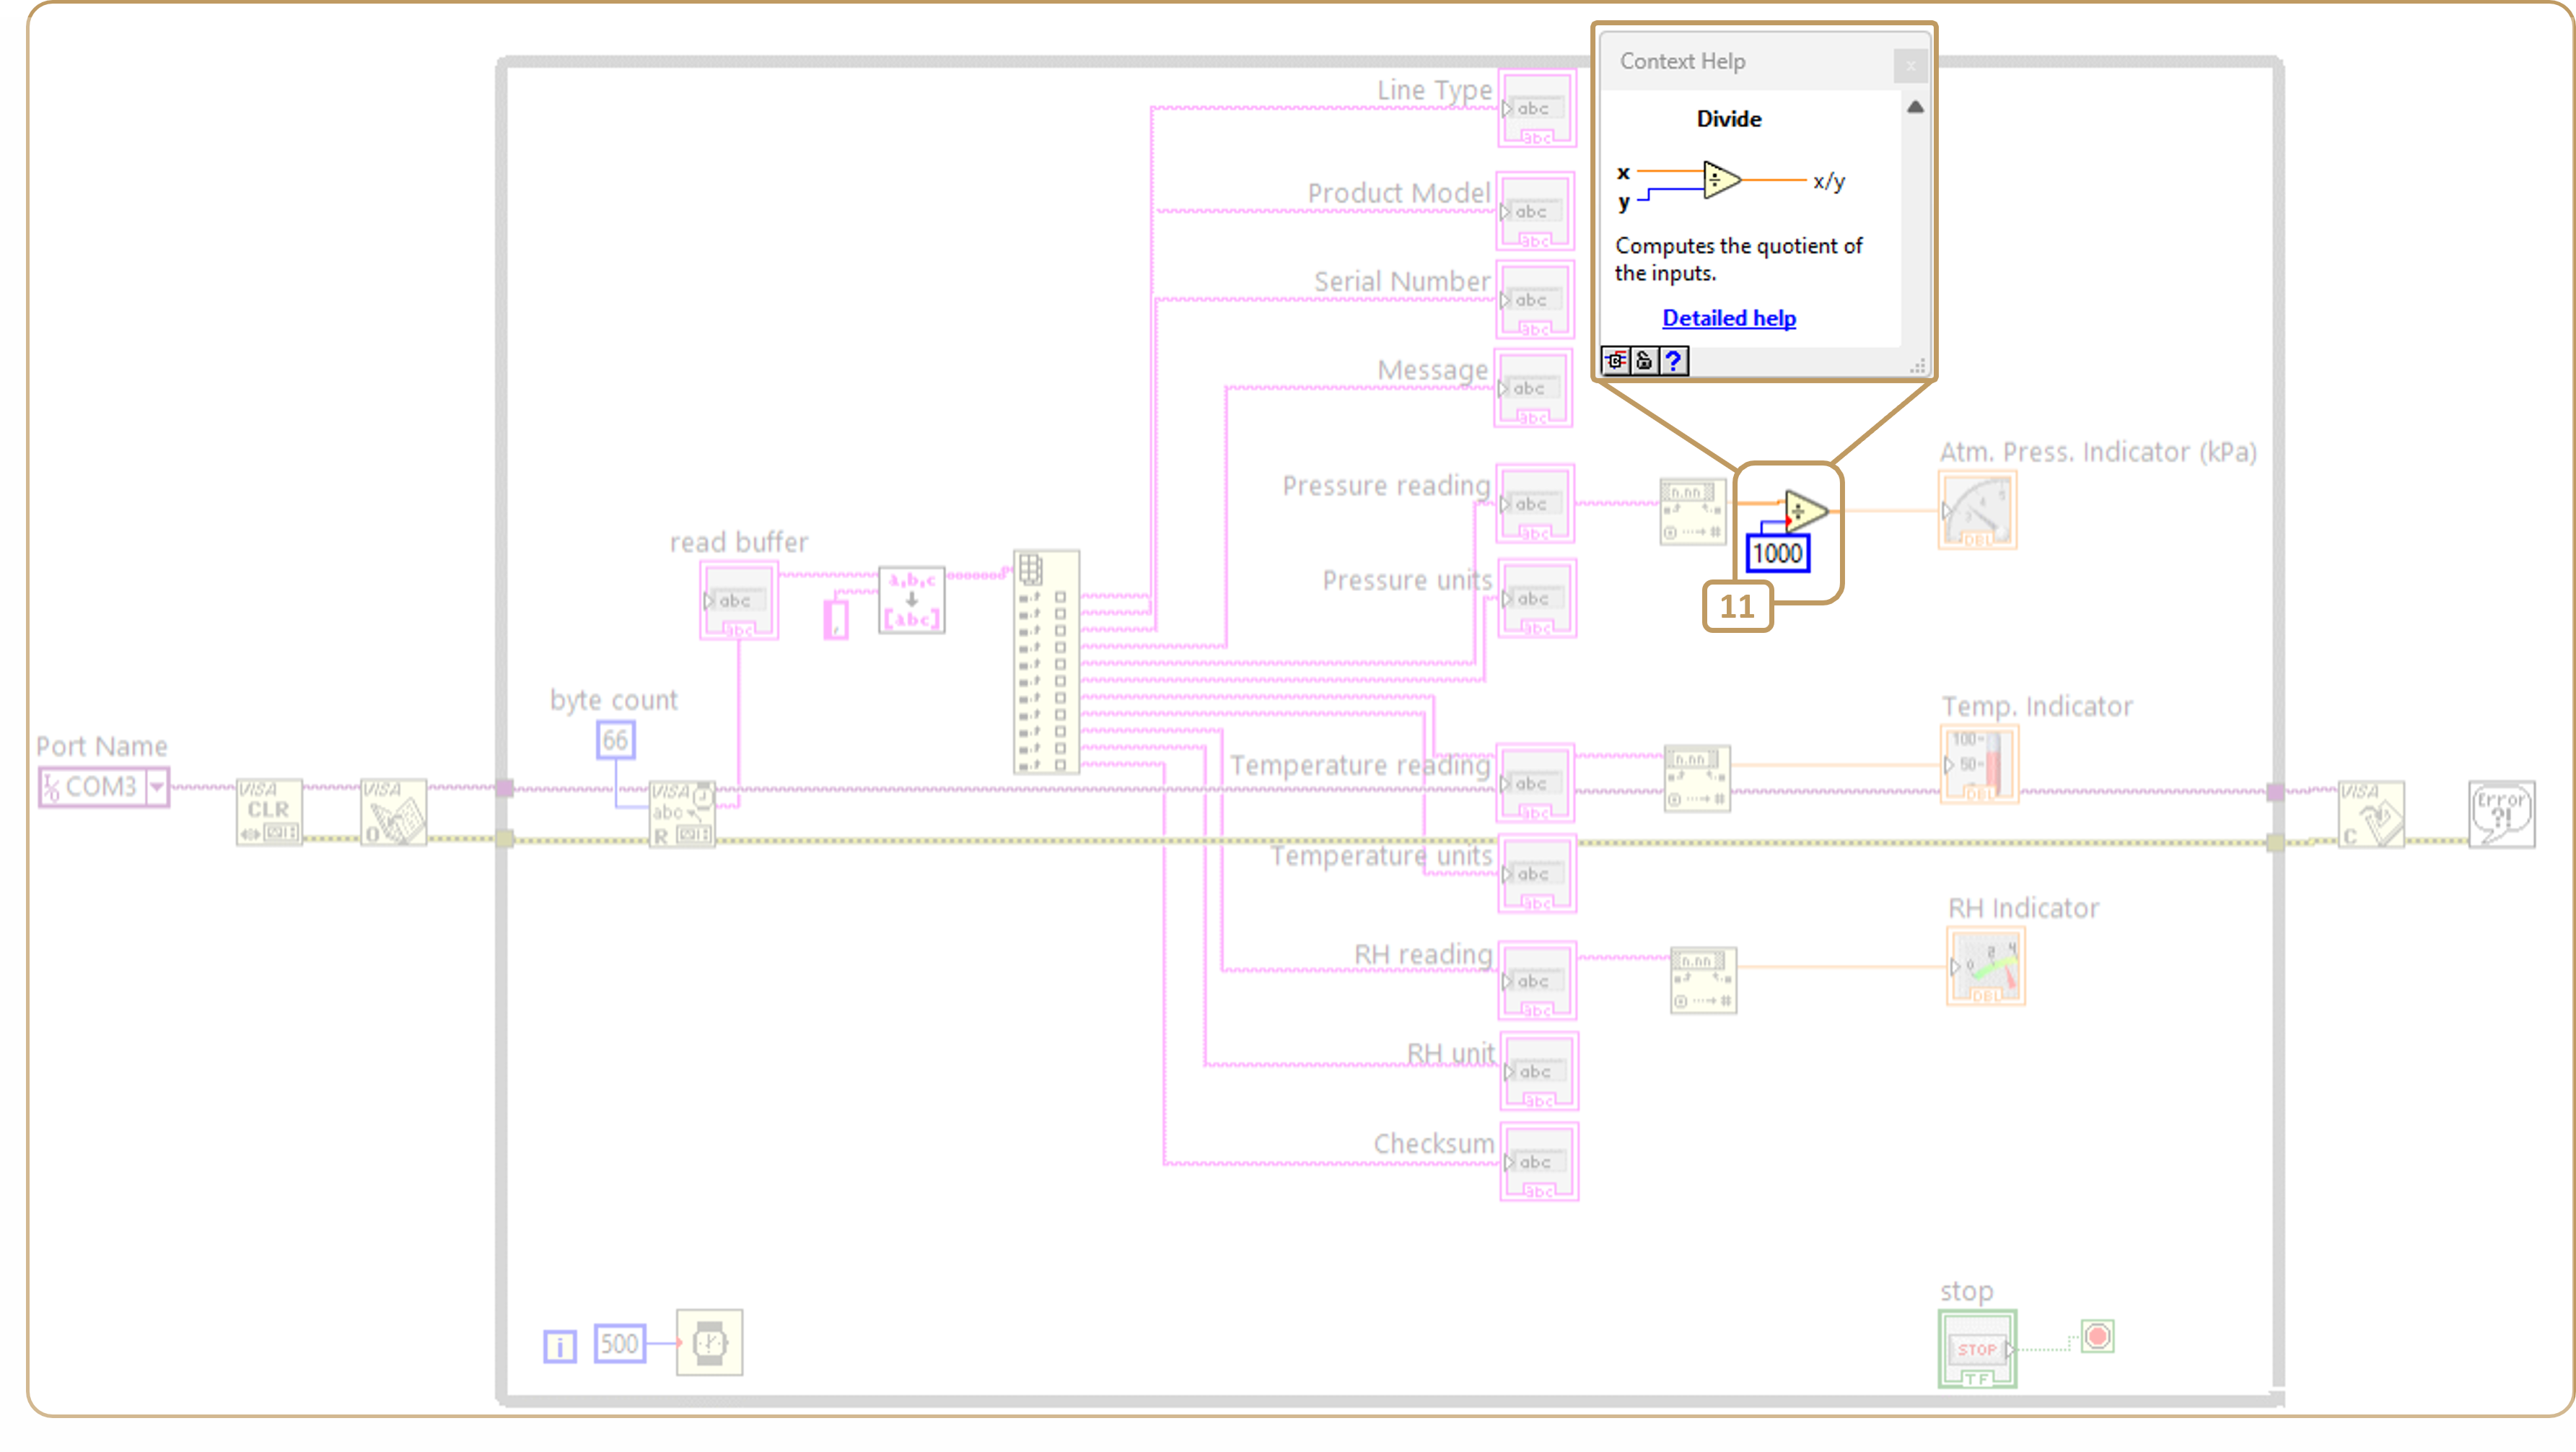
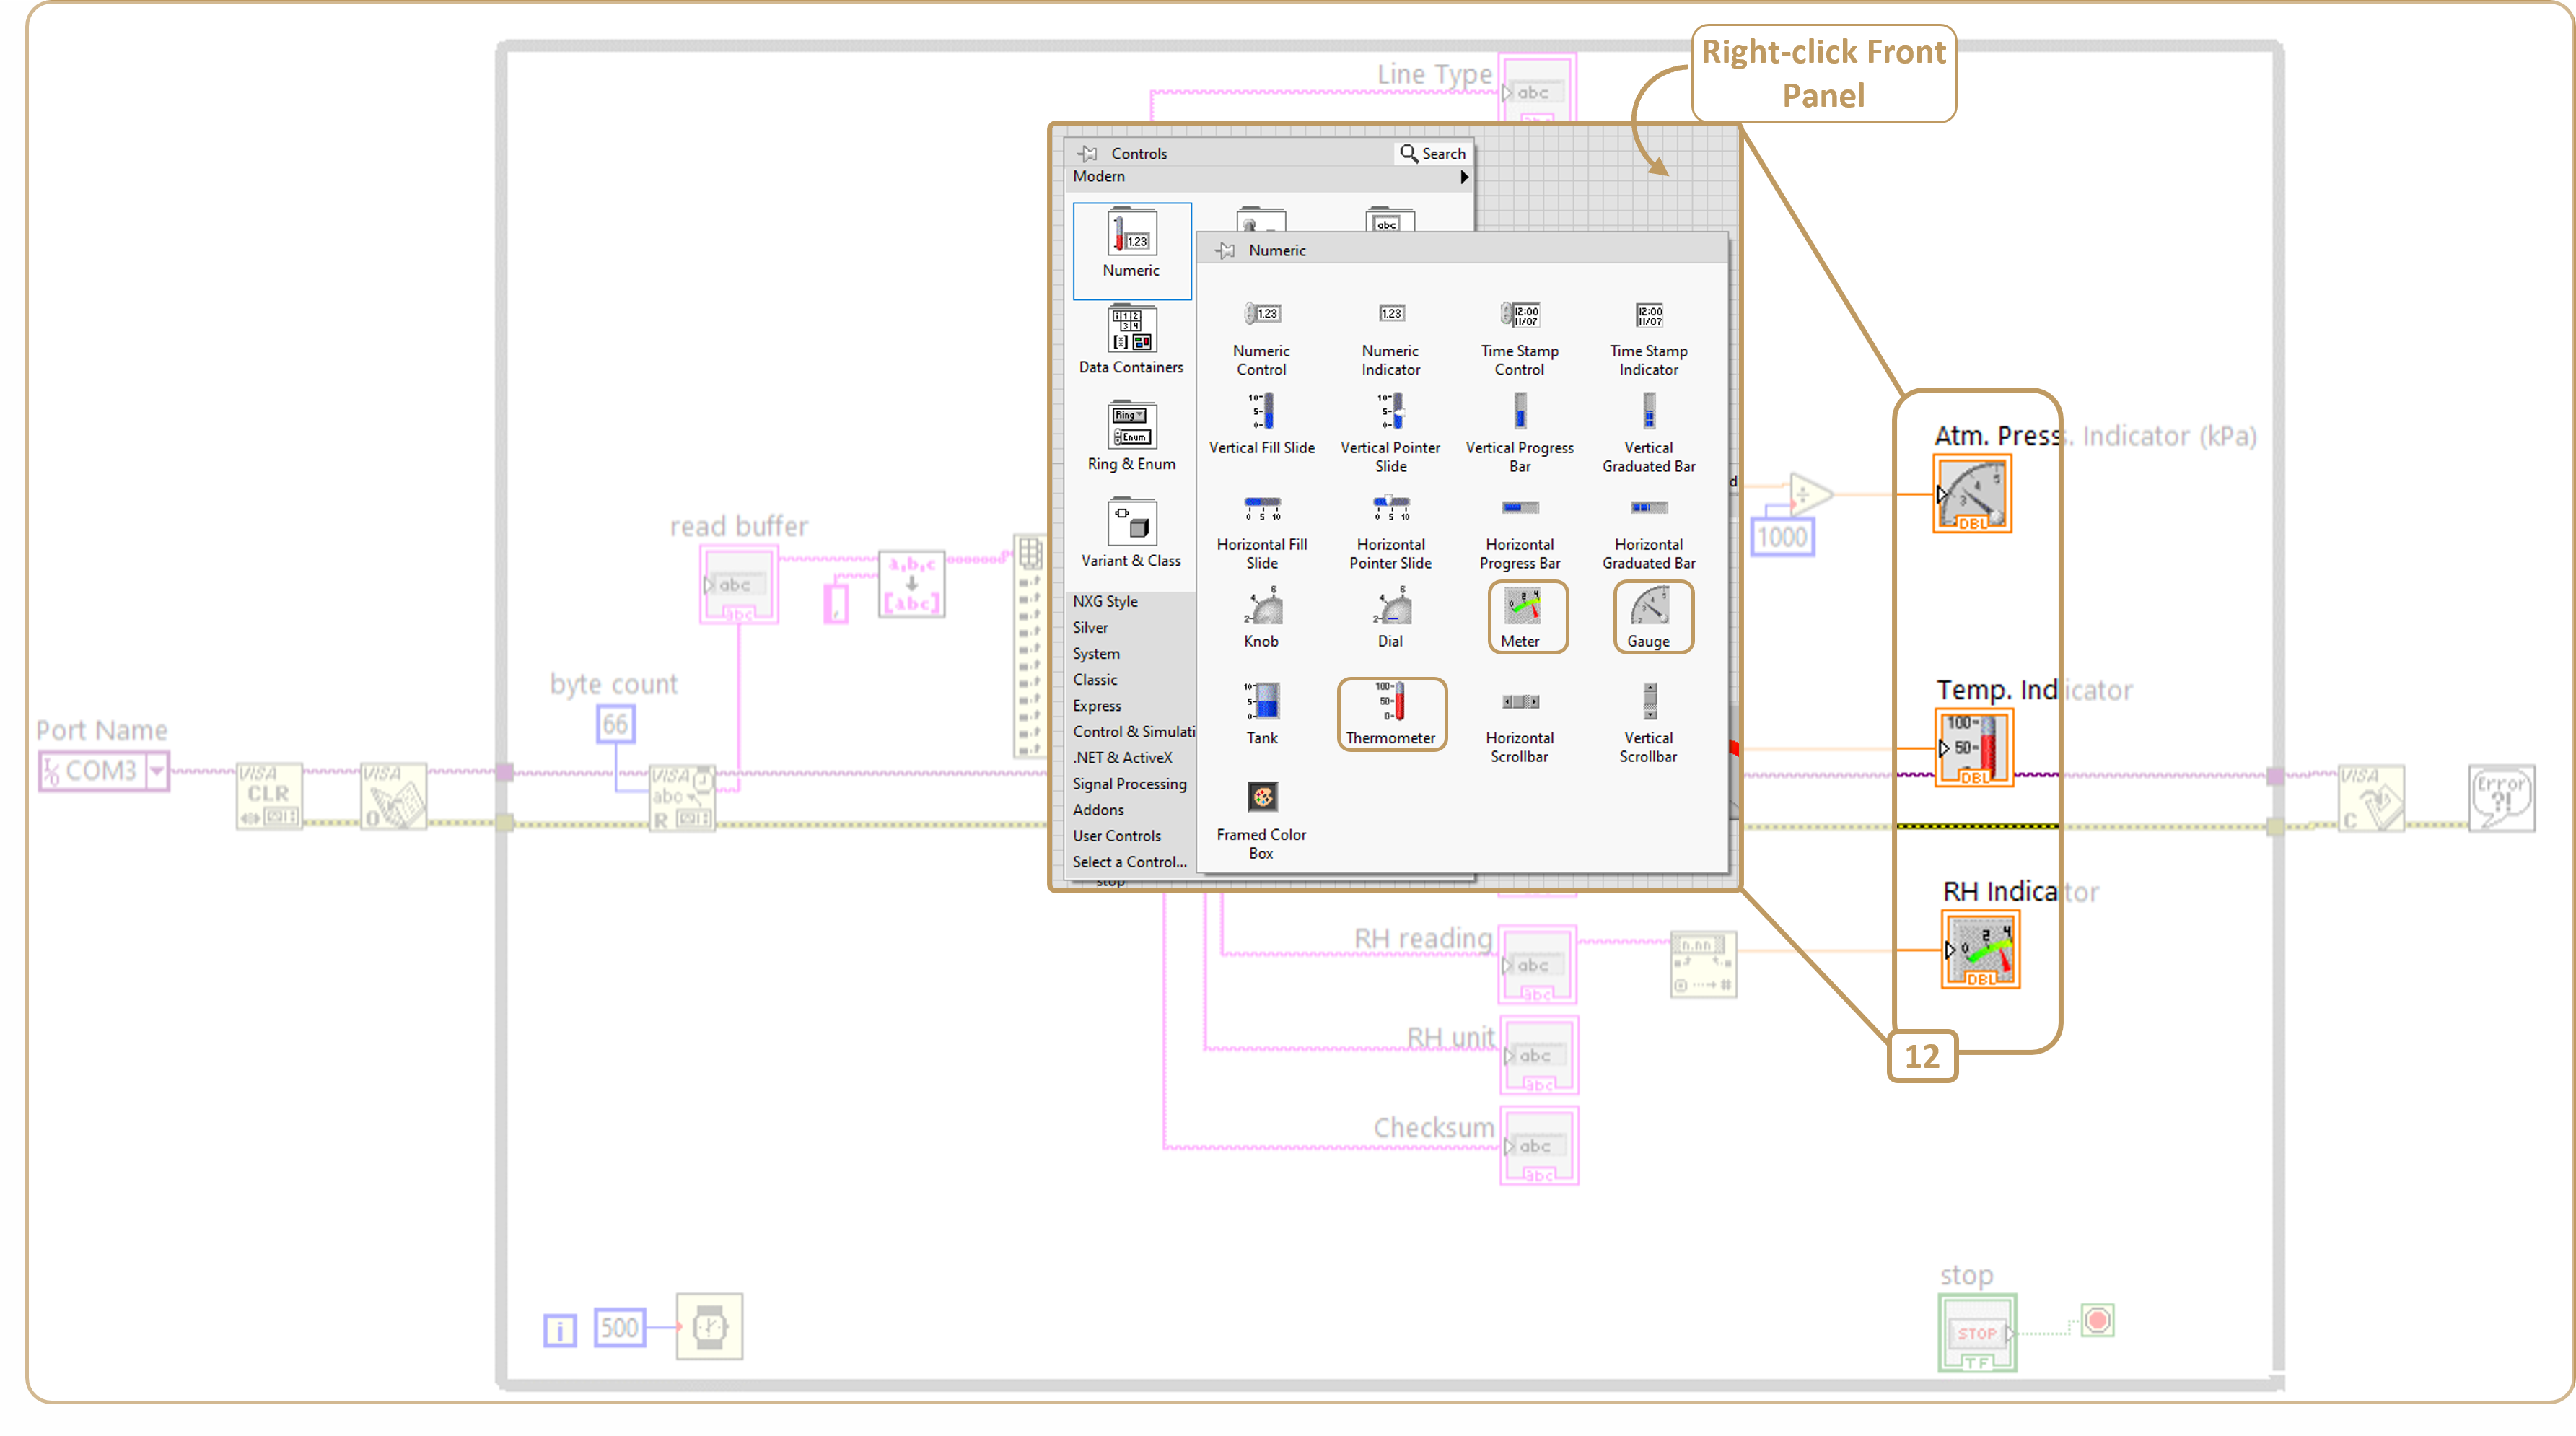
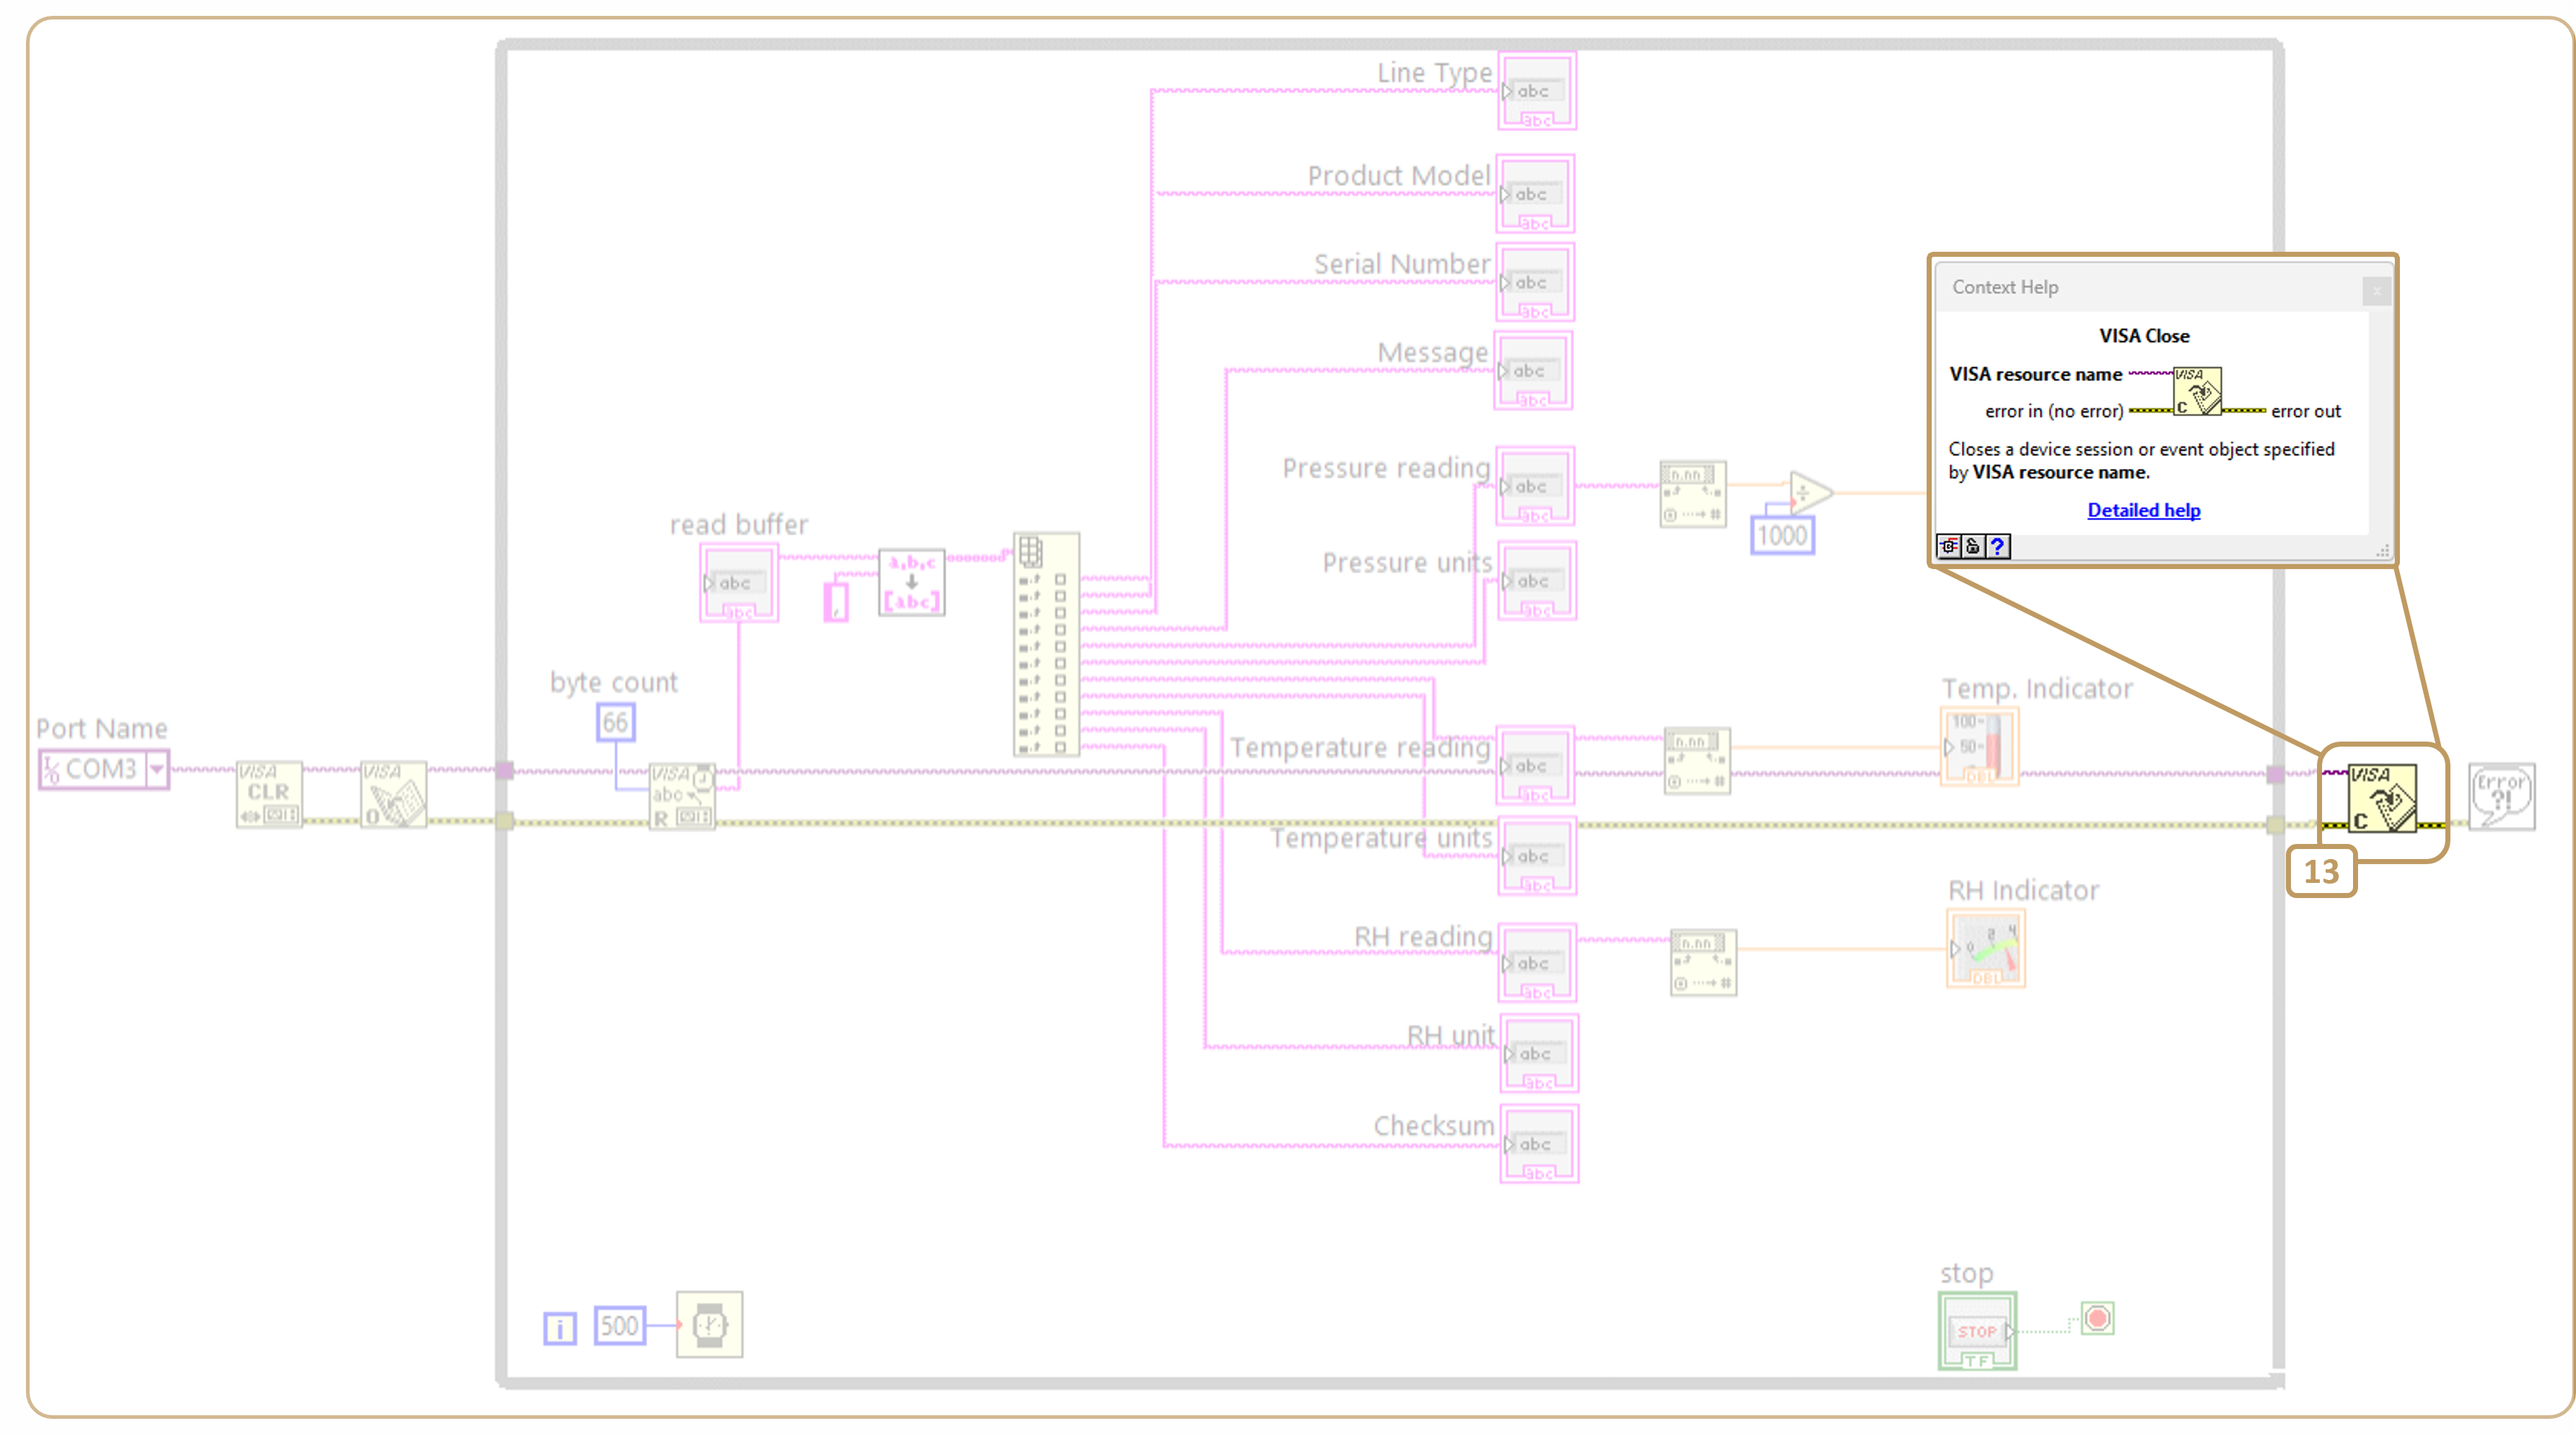
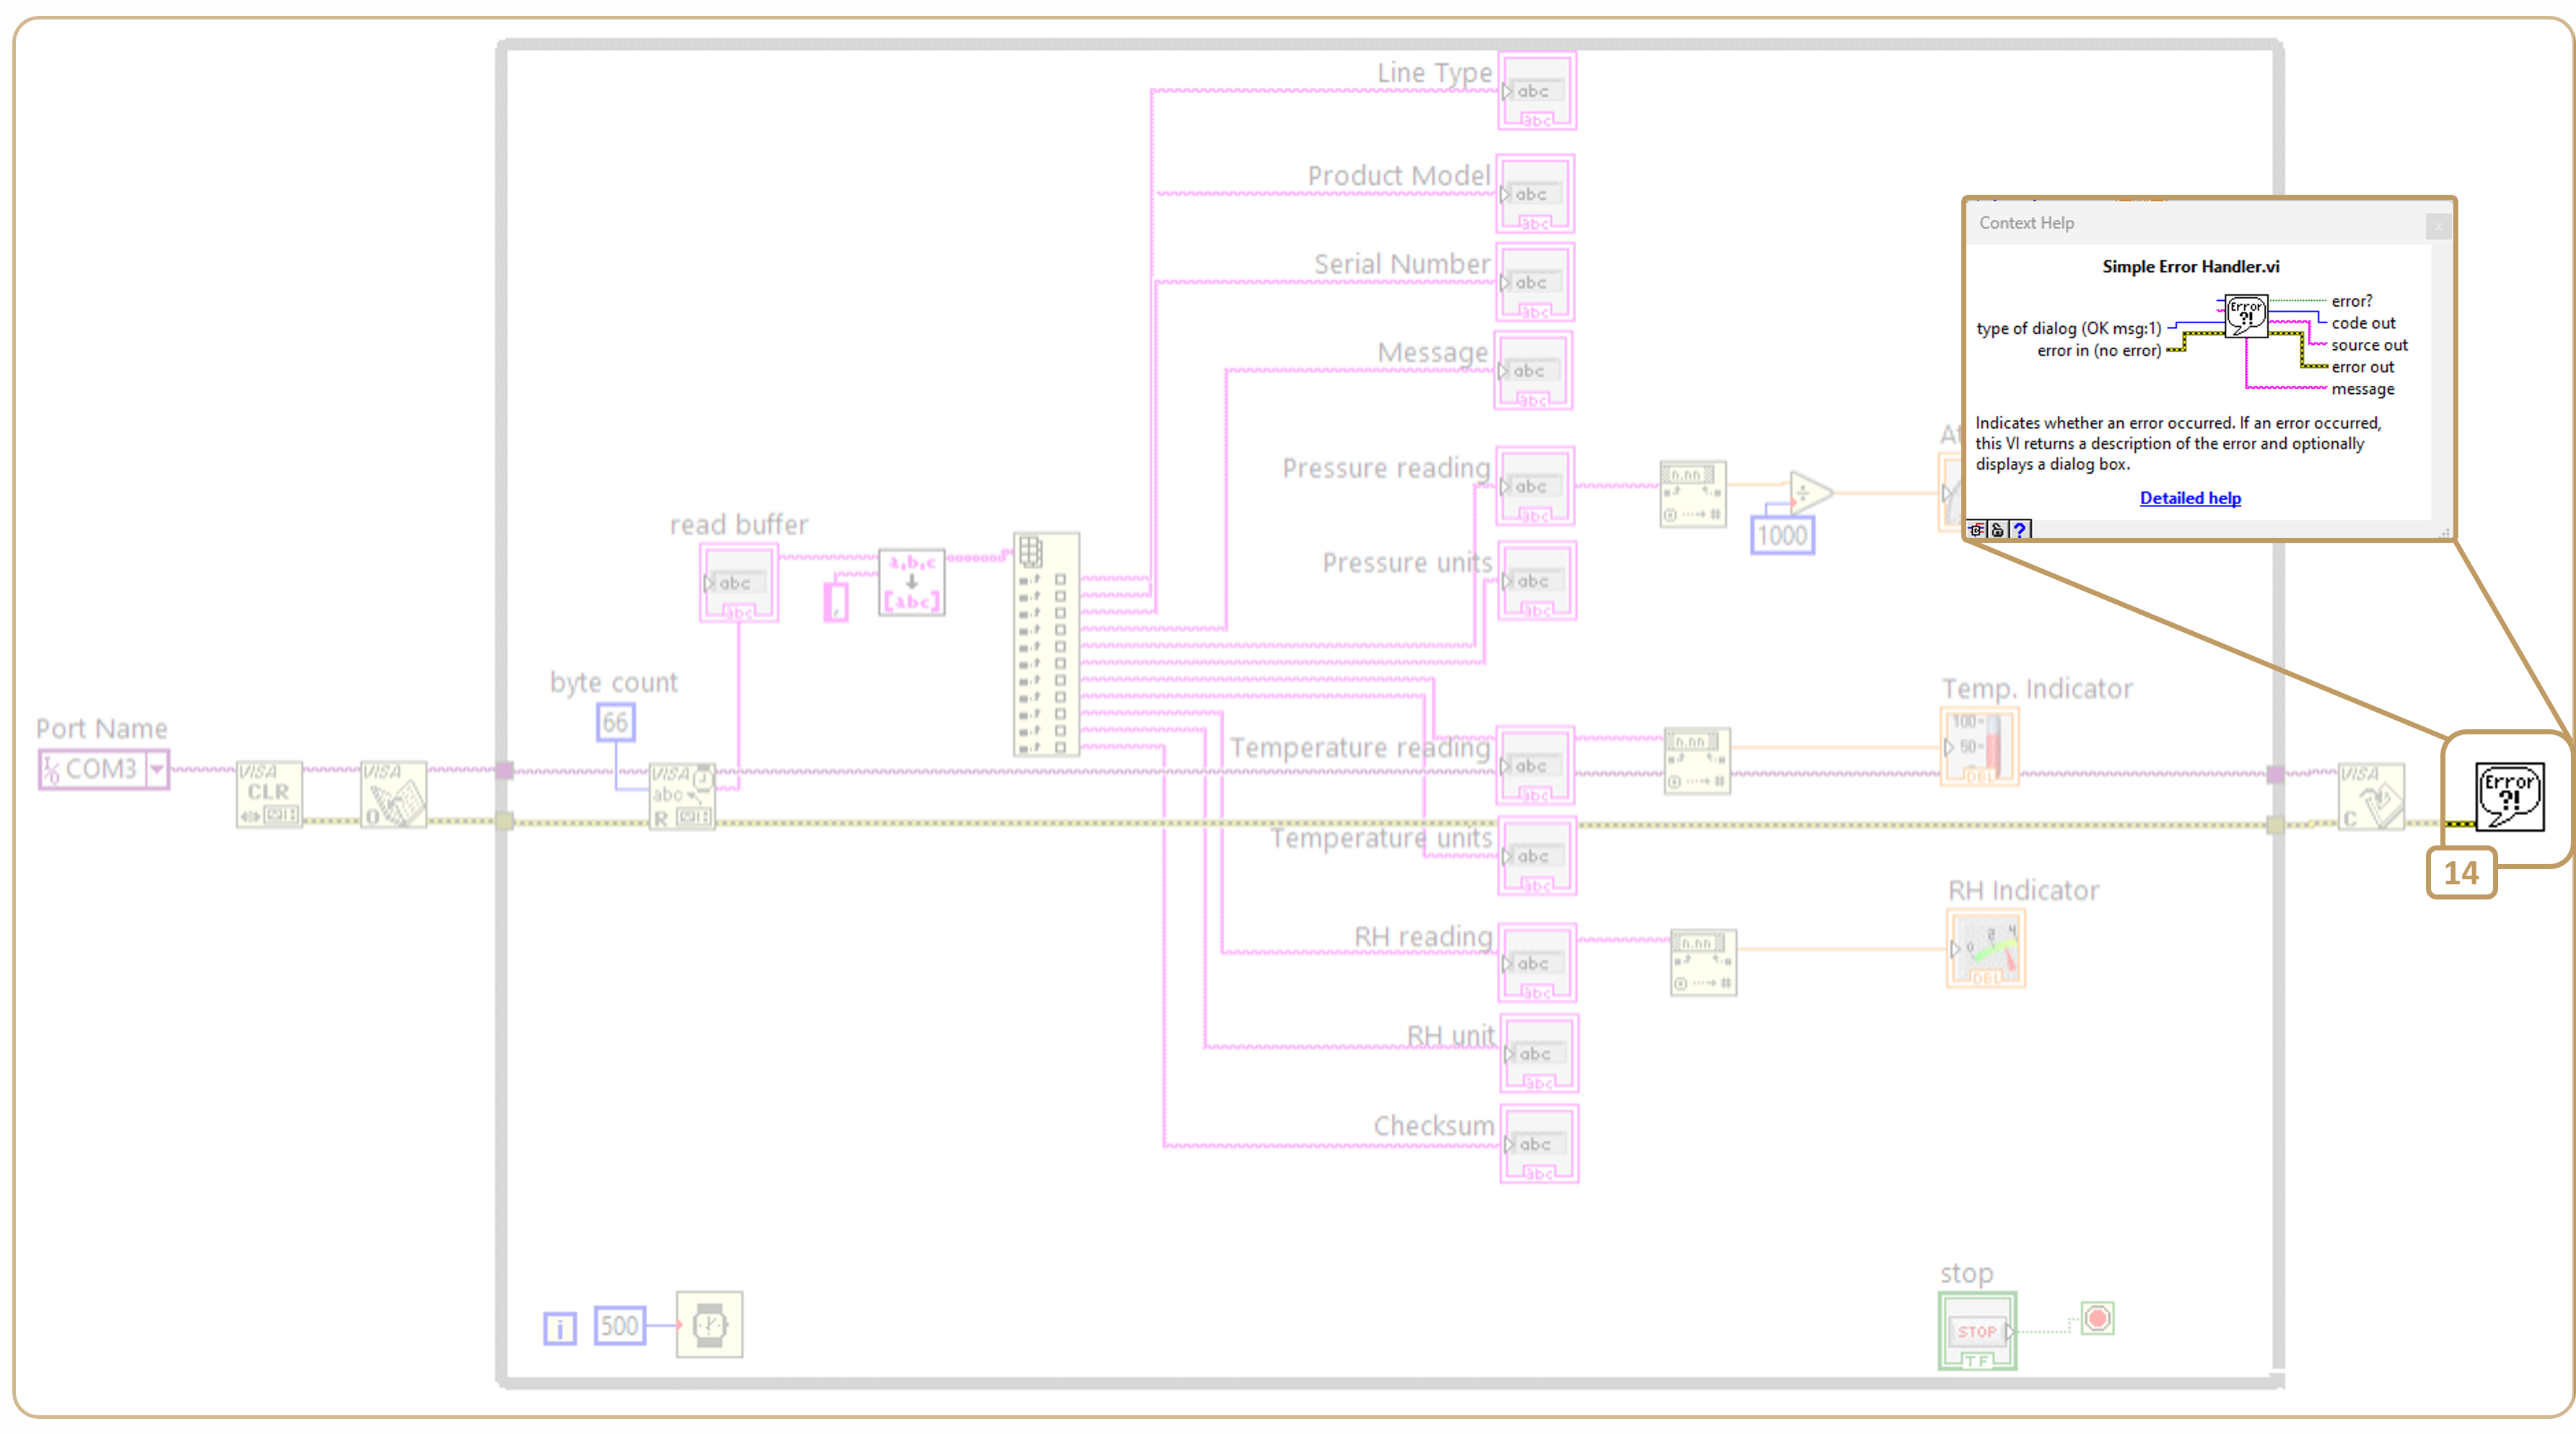
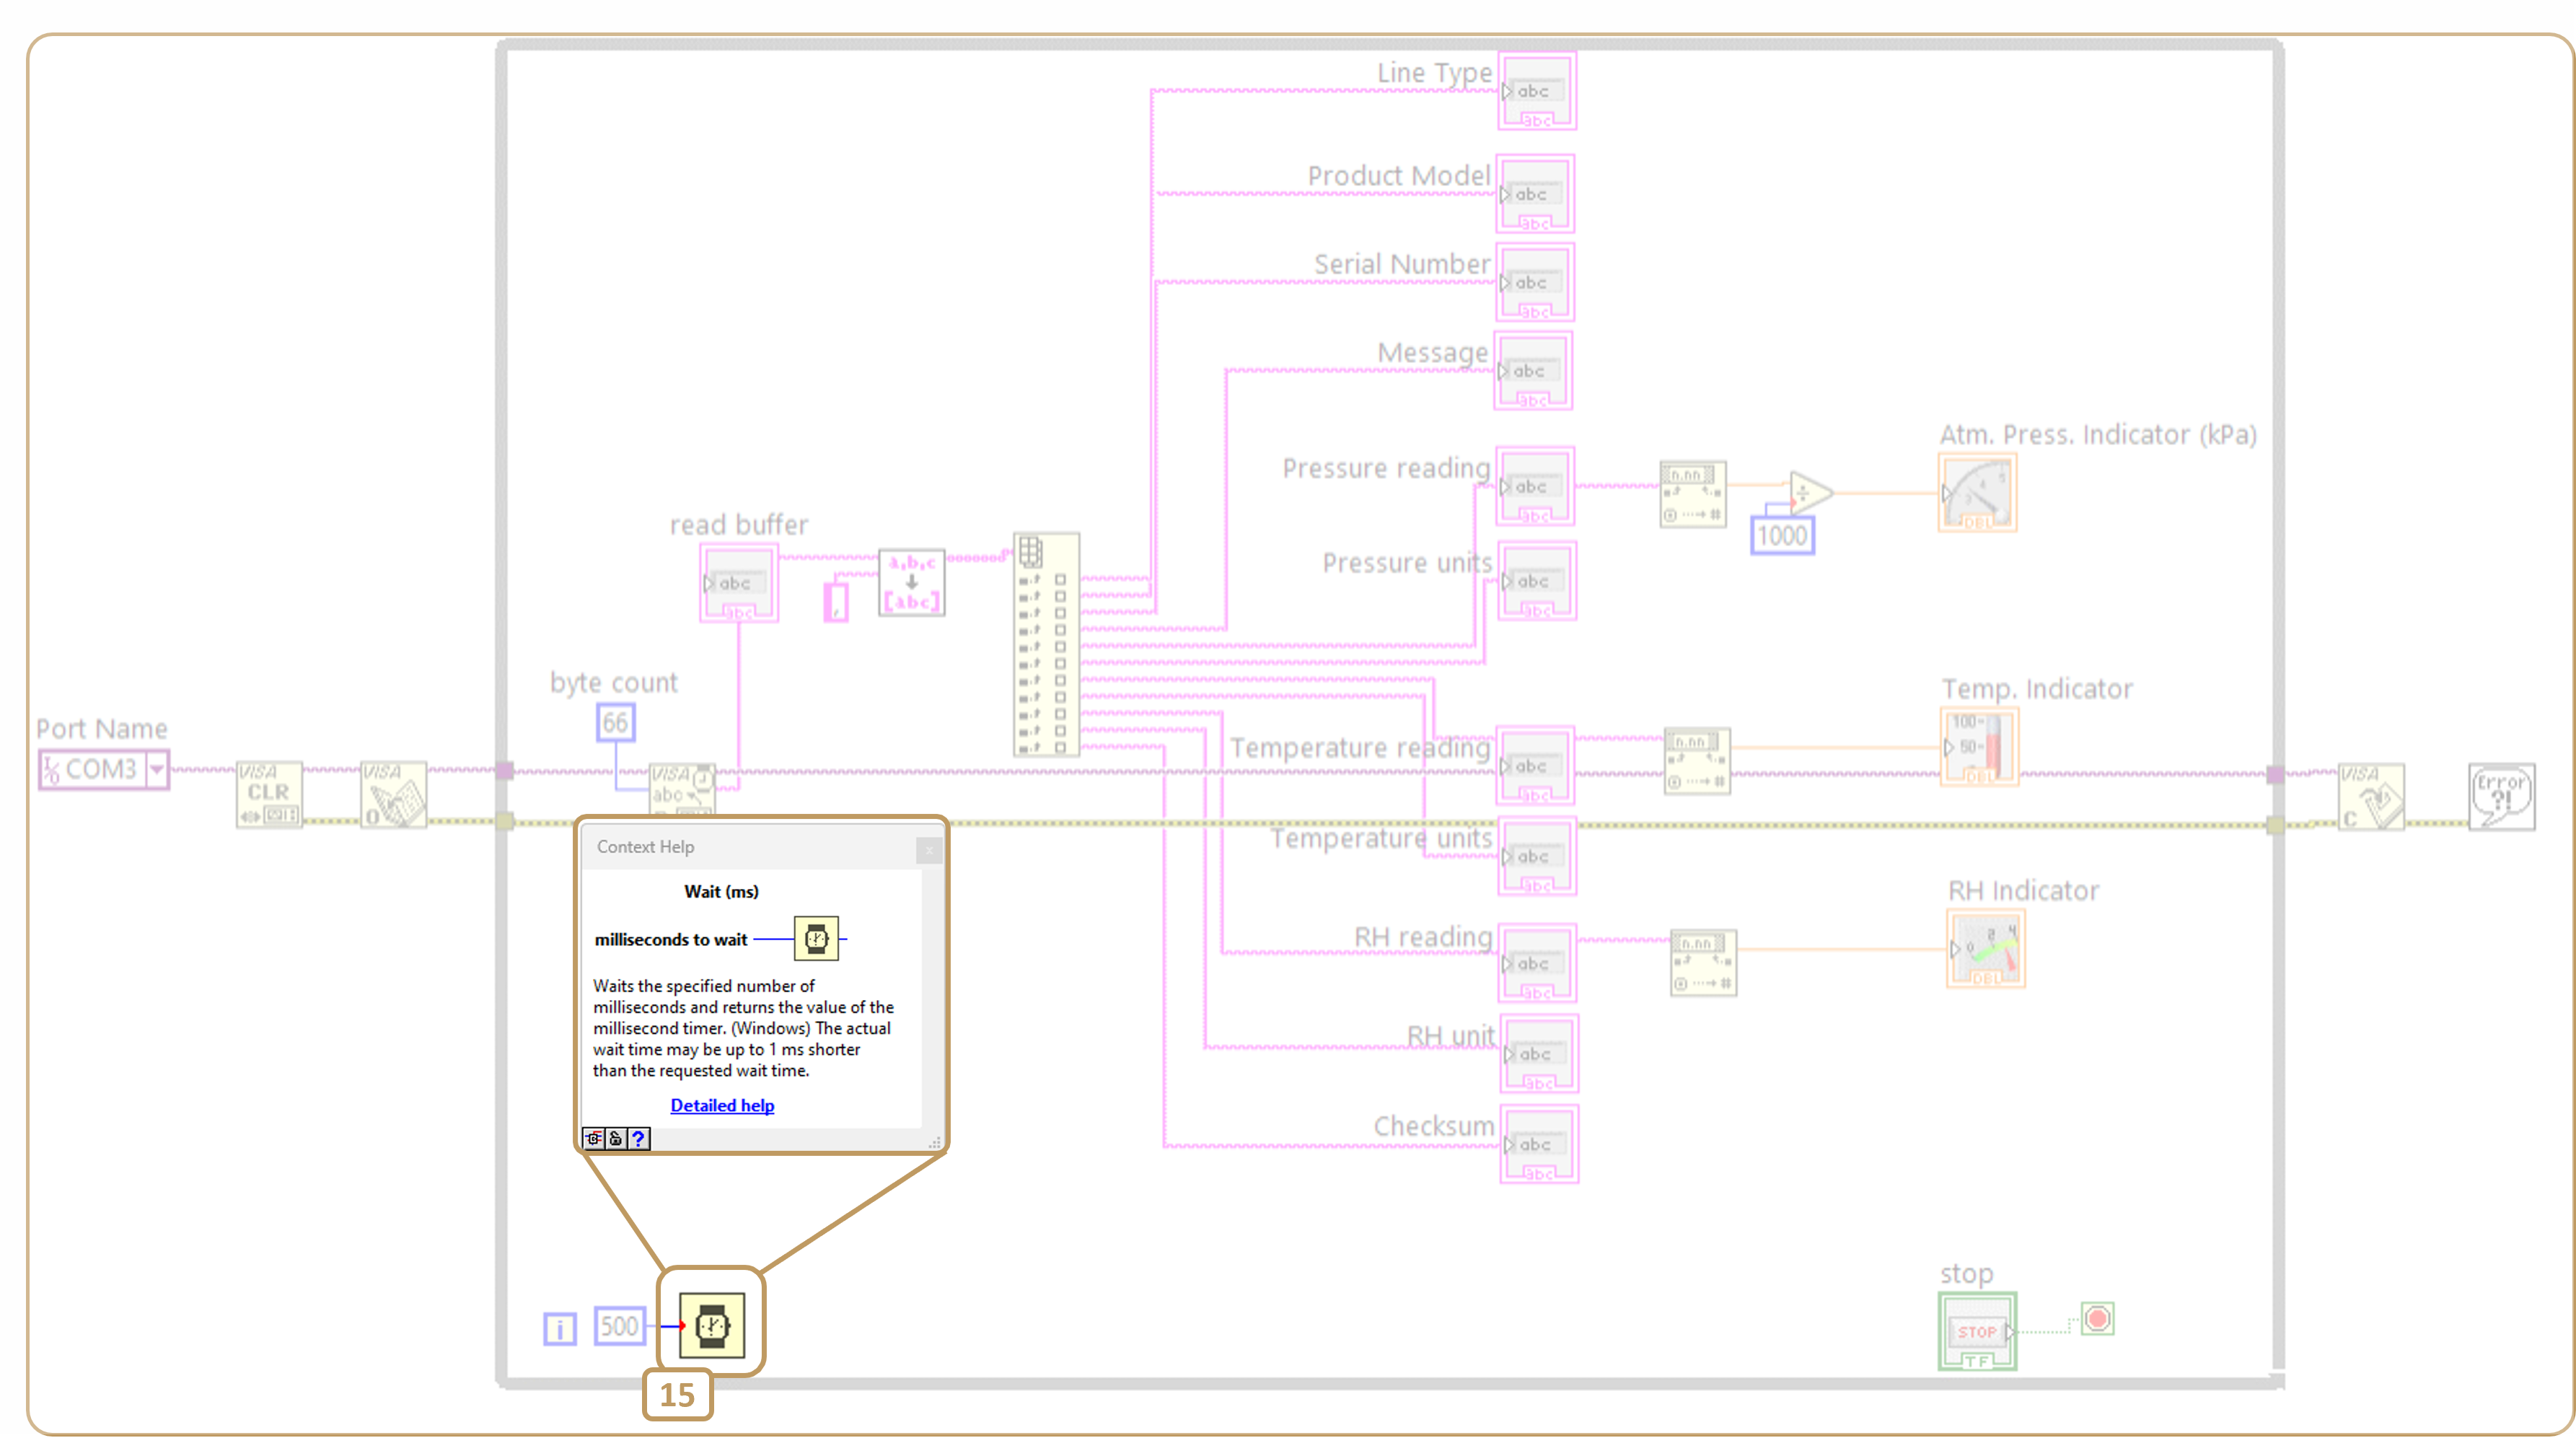
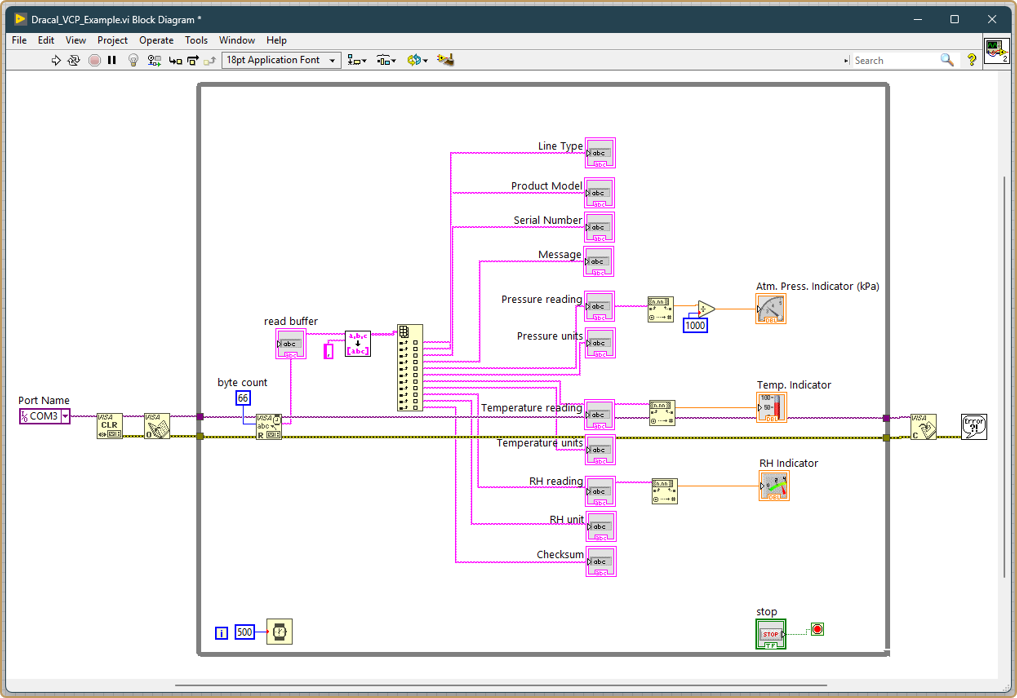
This model is presented as an example and can easily be simplified. Many of the visualization elements are practical to start with, but are not necessary in an automation context, for example. What's more, by its all-in-one nature, the model includes visualization of the 3 actual channels available for this product. If your product measures a different number of parameters, it will be necessary to adjust steps 7 to 11 below according to the number of actual channels available.
Checksum management, which is more complex to handle, has been deliberately left out to make the model as easy to digest as possible for a first implementation.
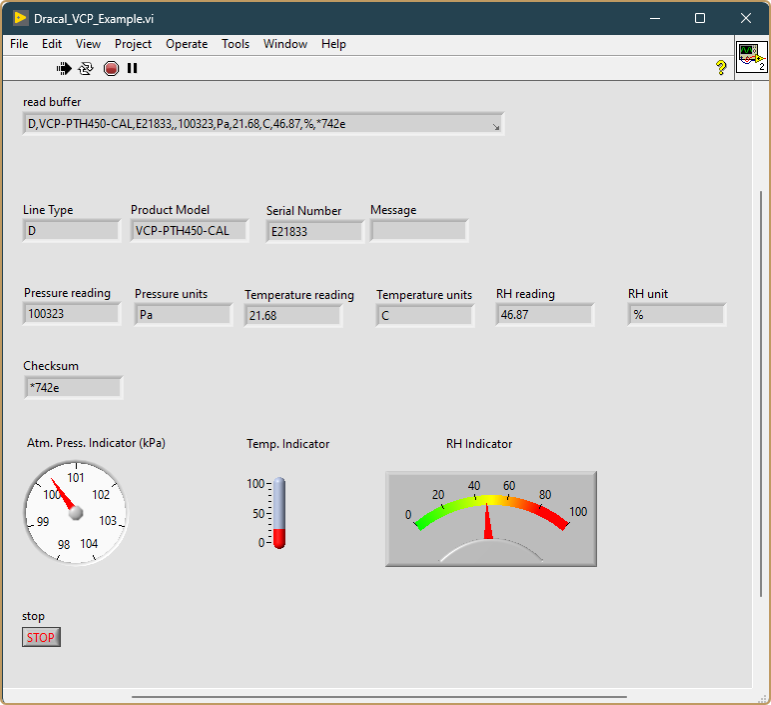
Here are the block diagram and front panel of the completed model:
Block Diagram
Front Panel
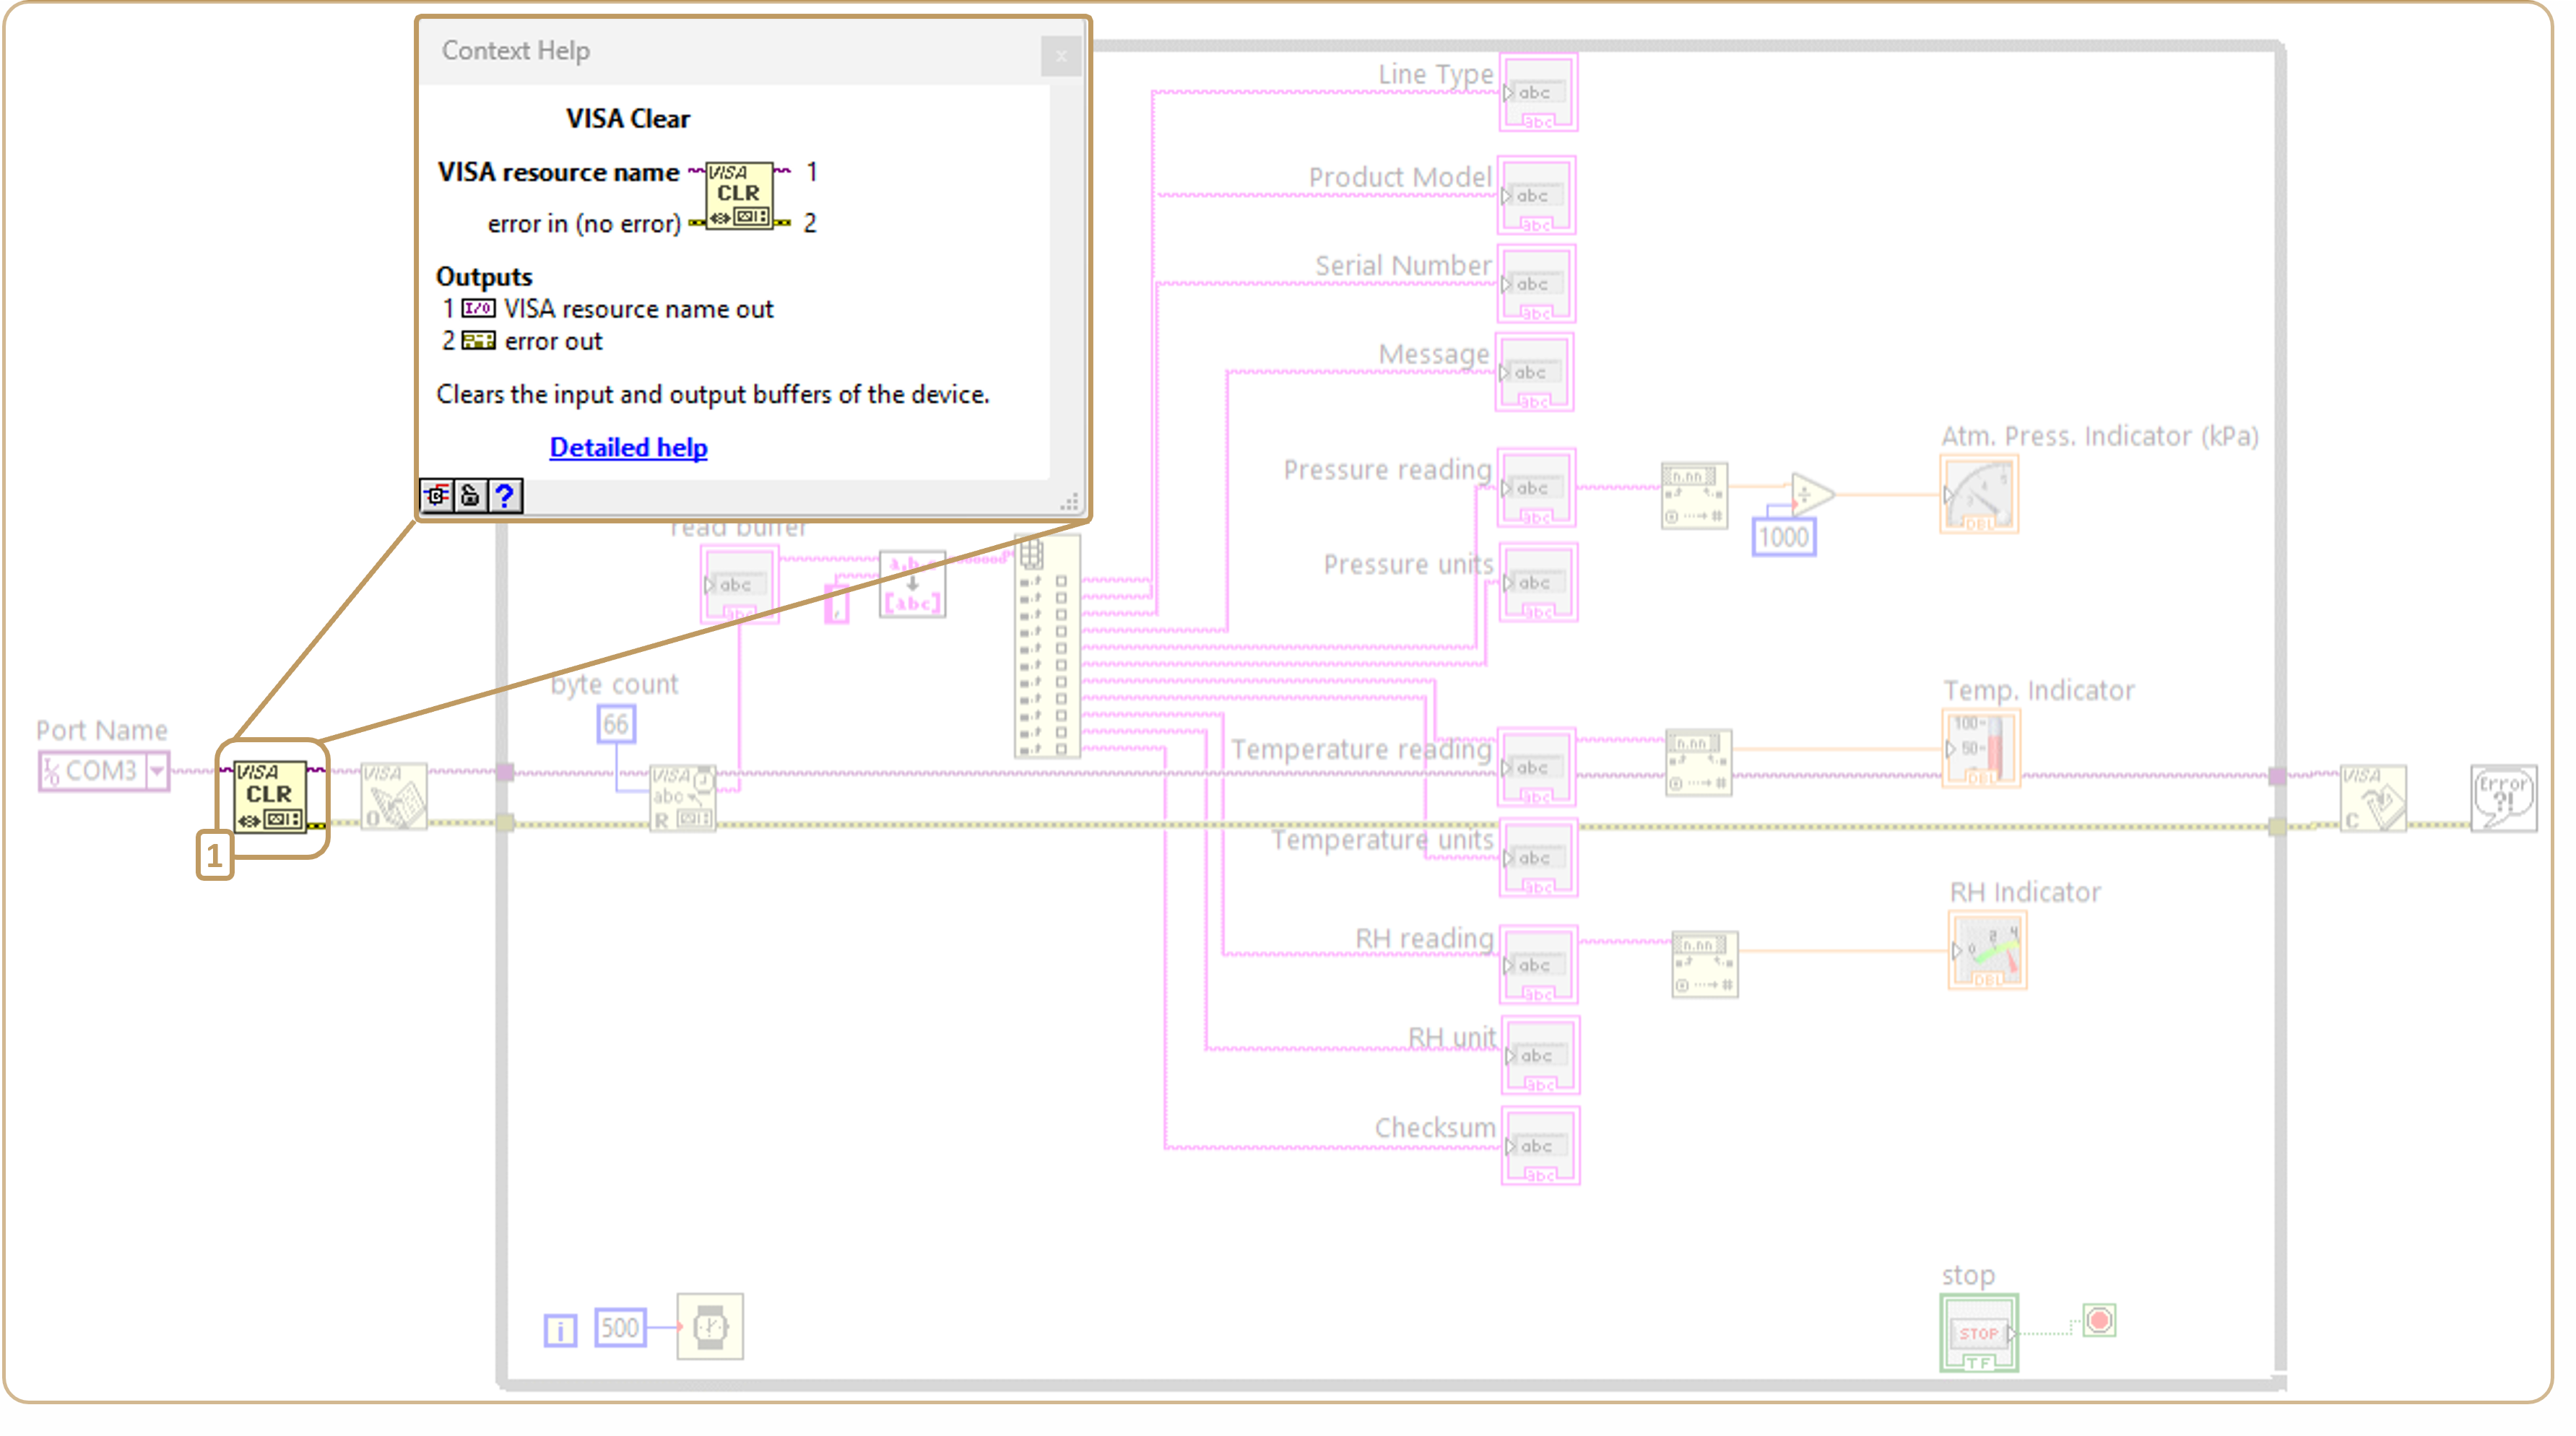
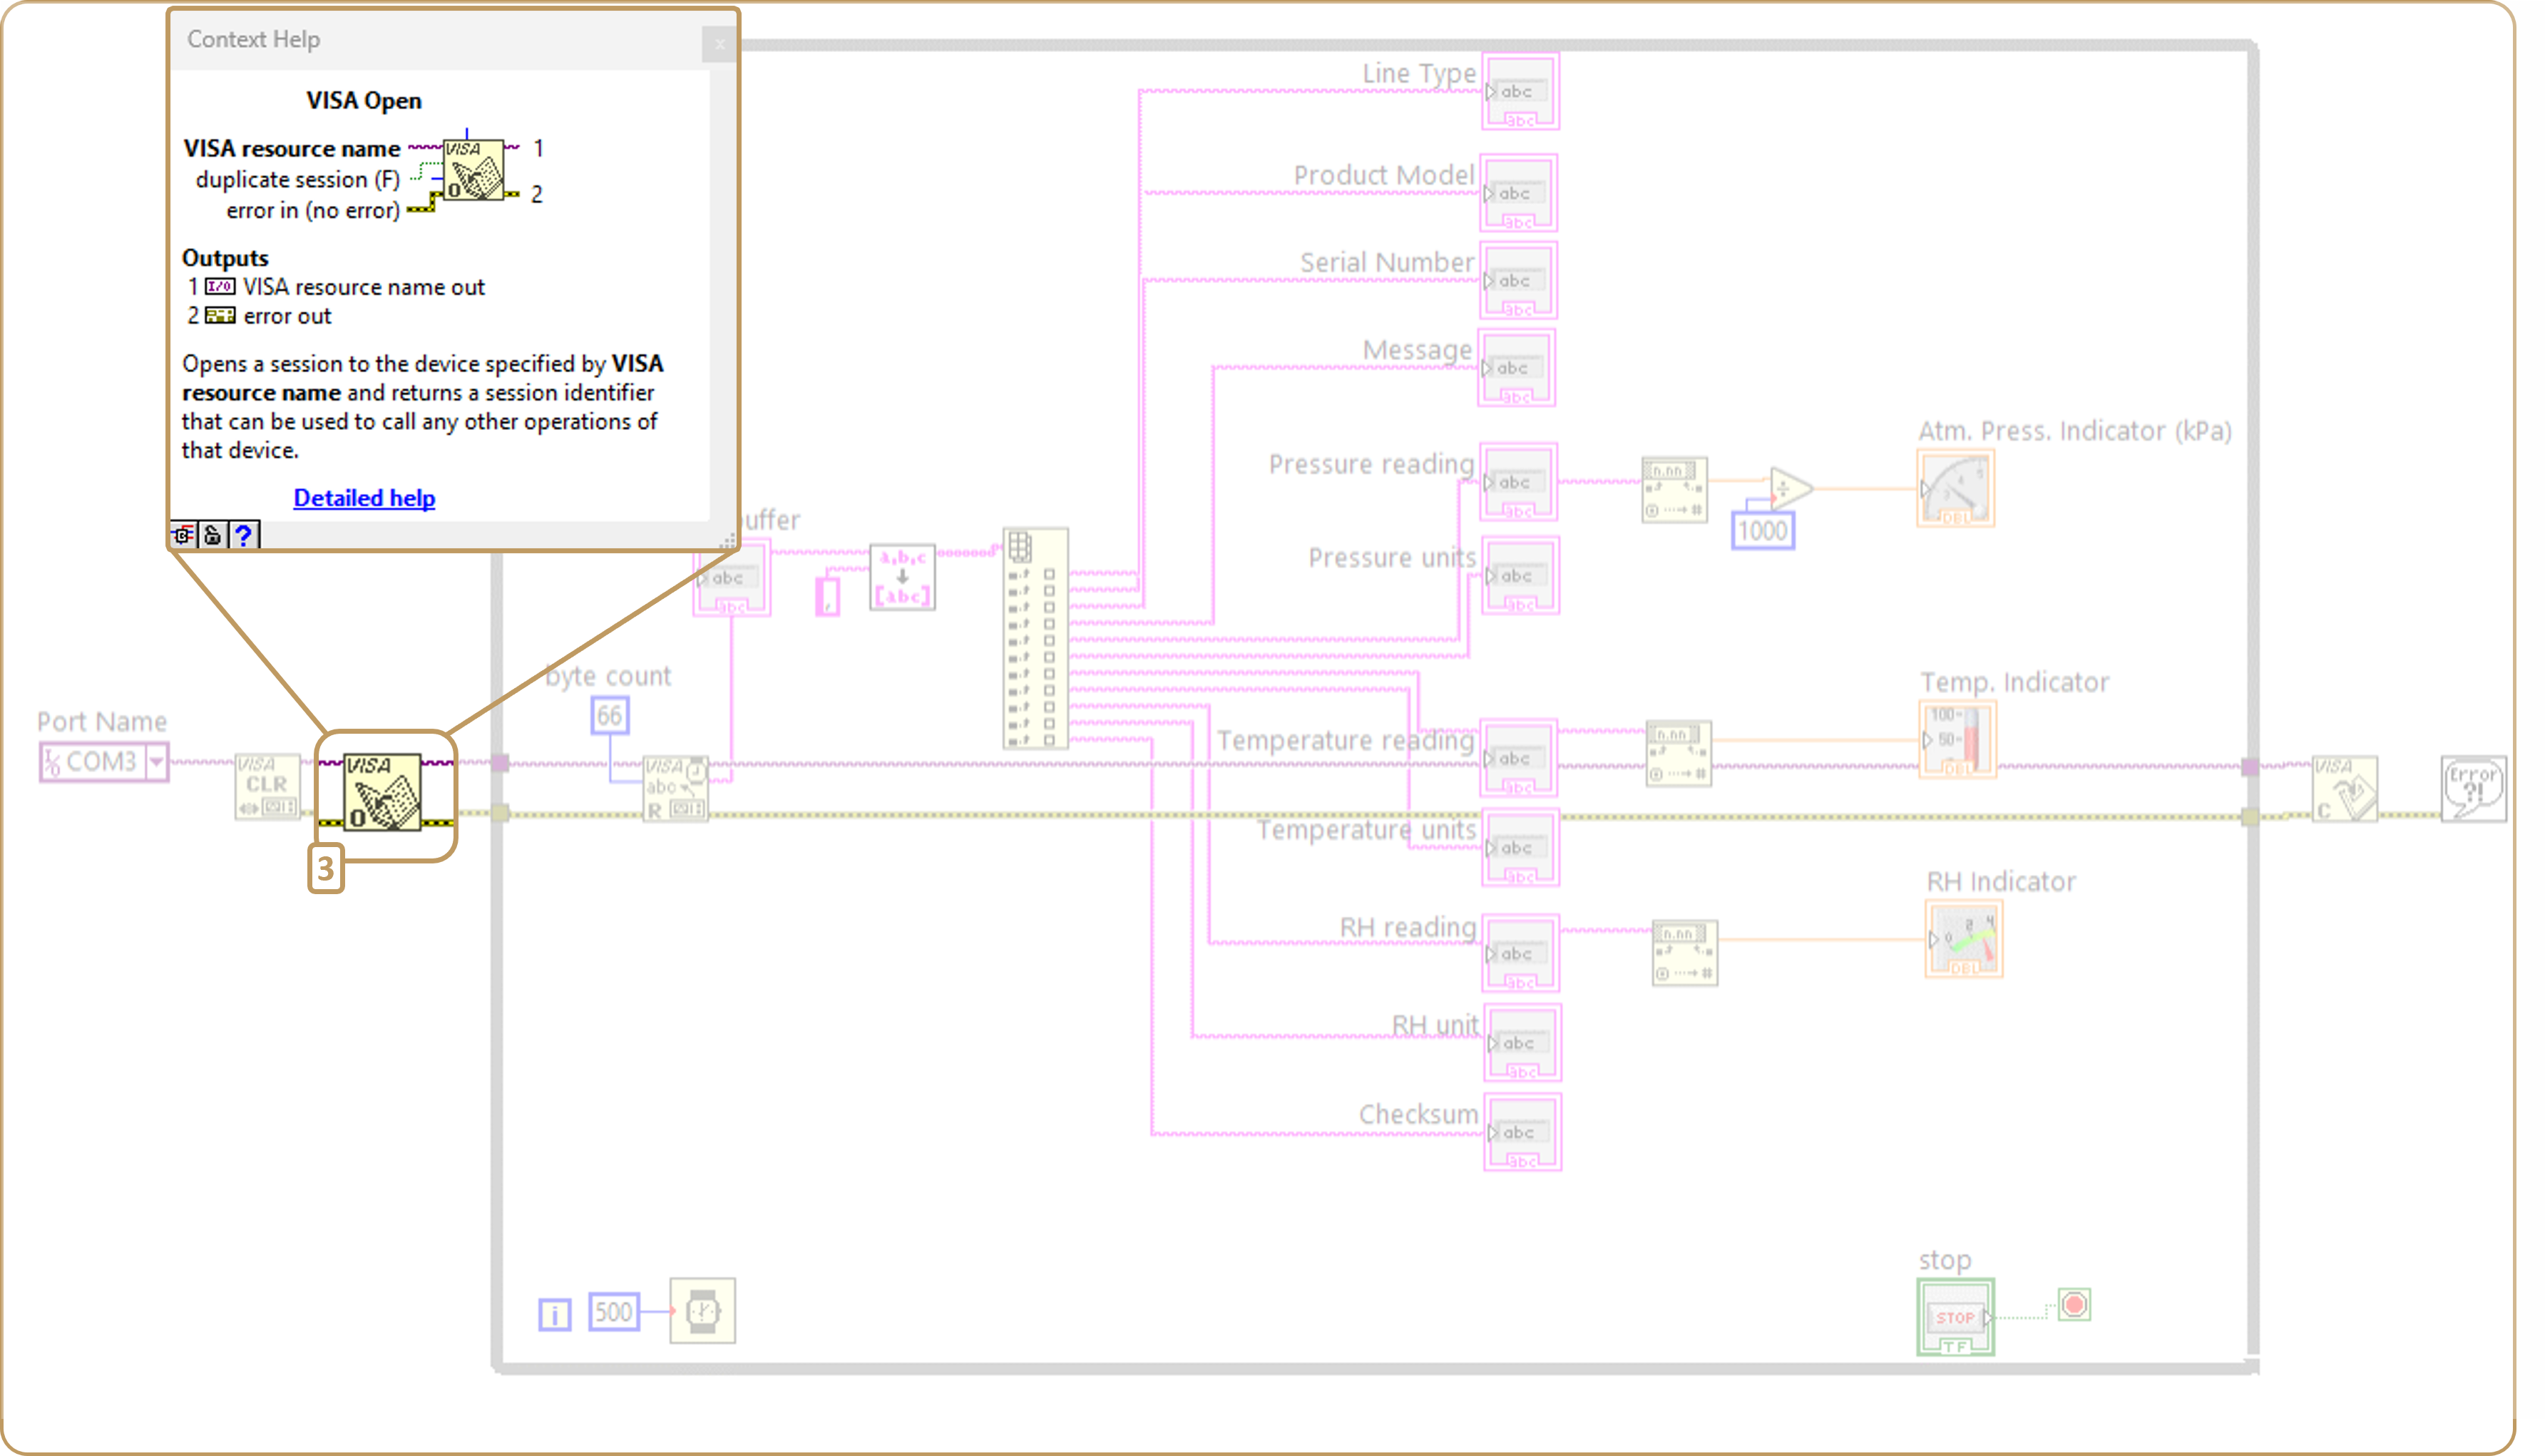
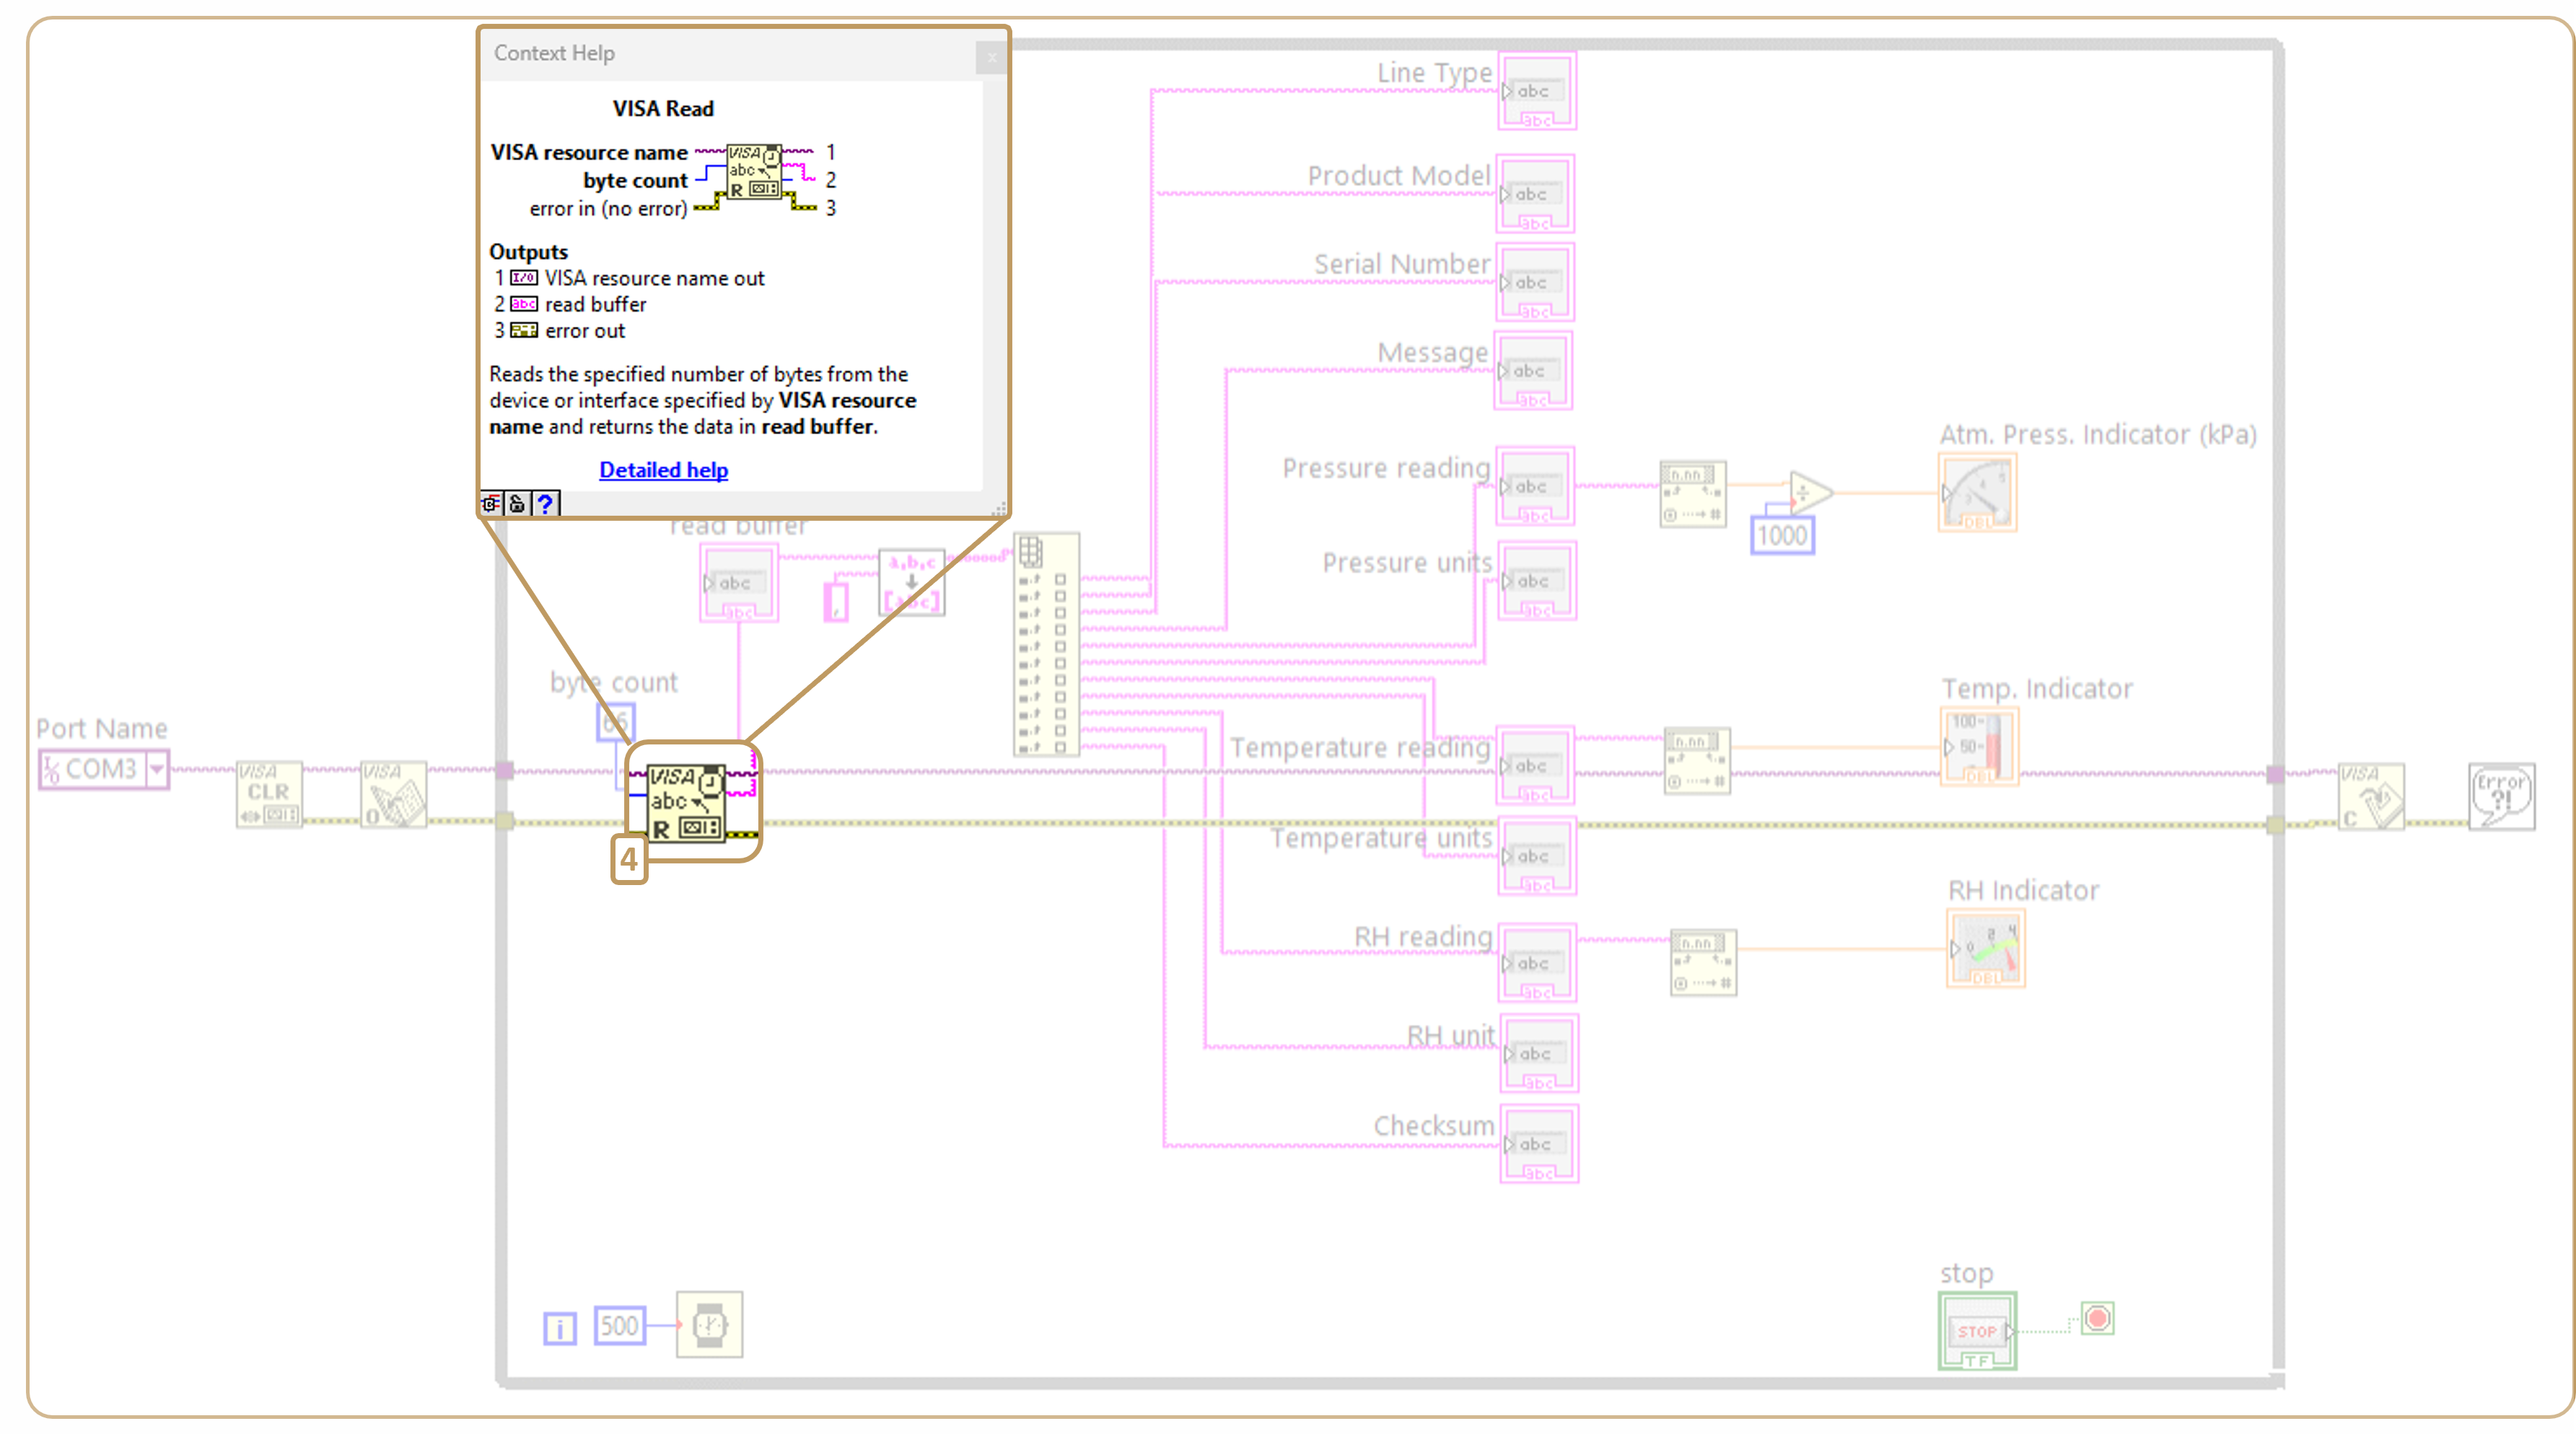
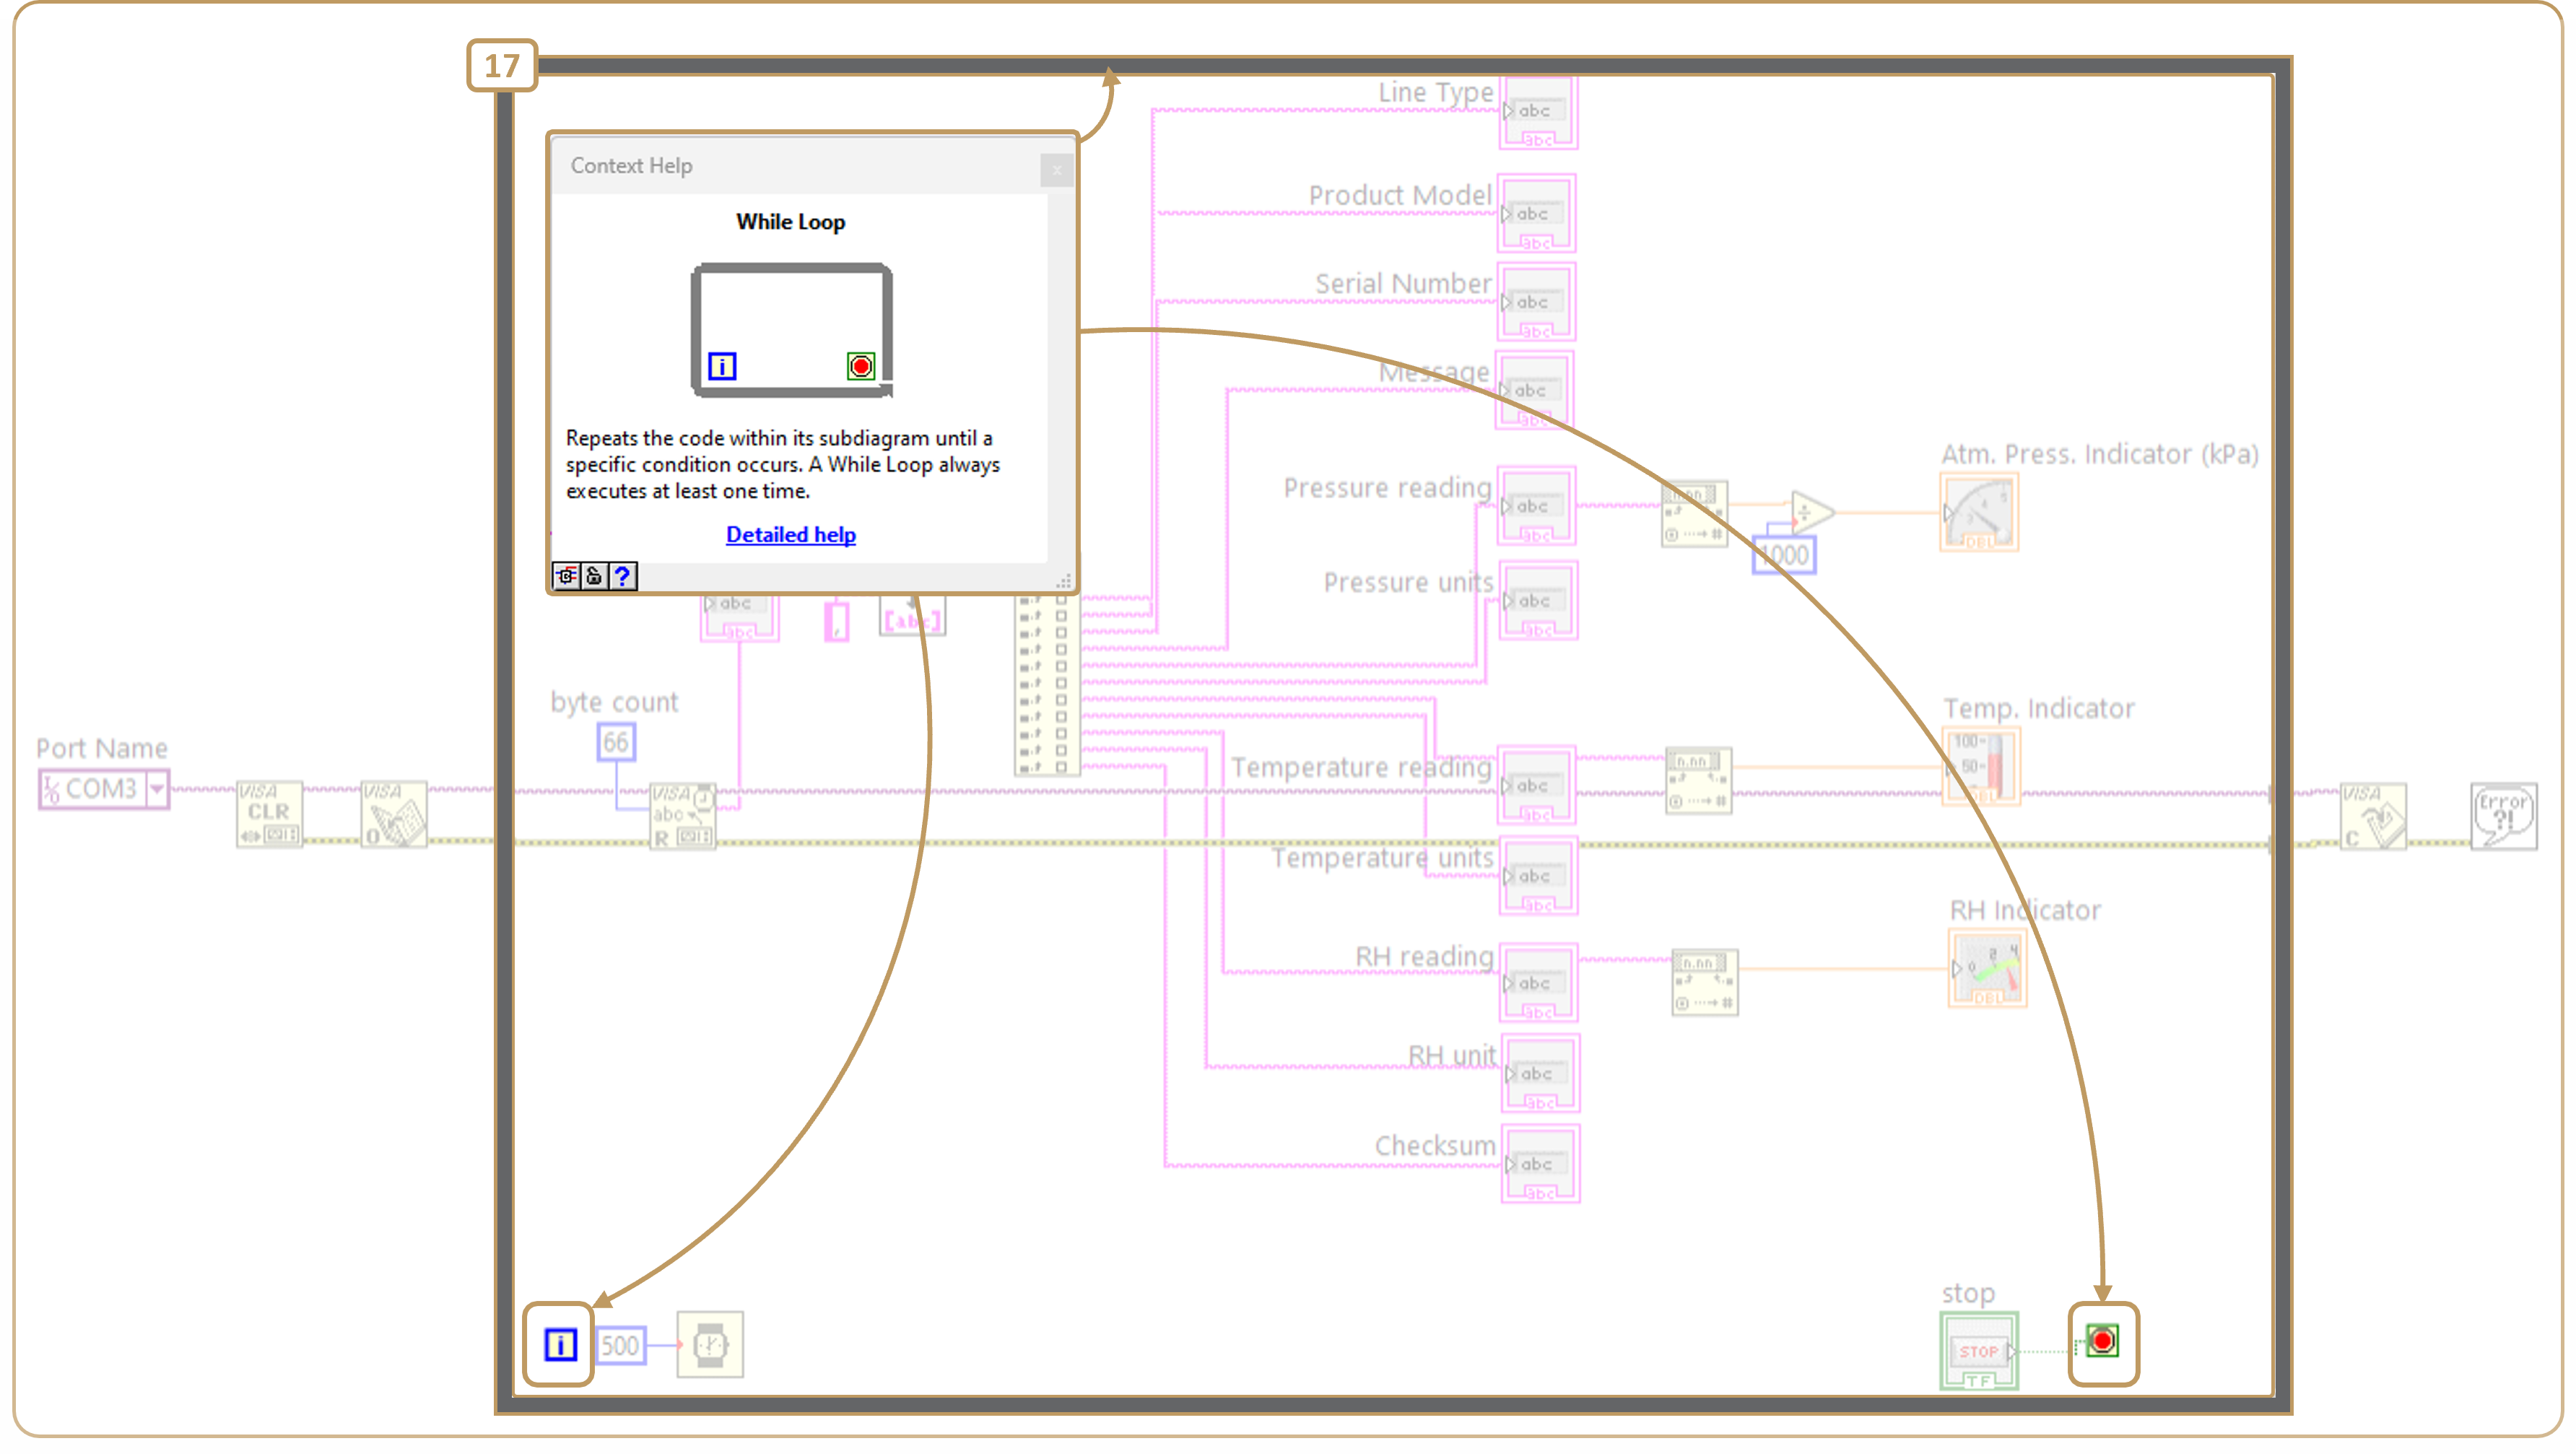
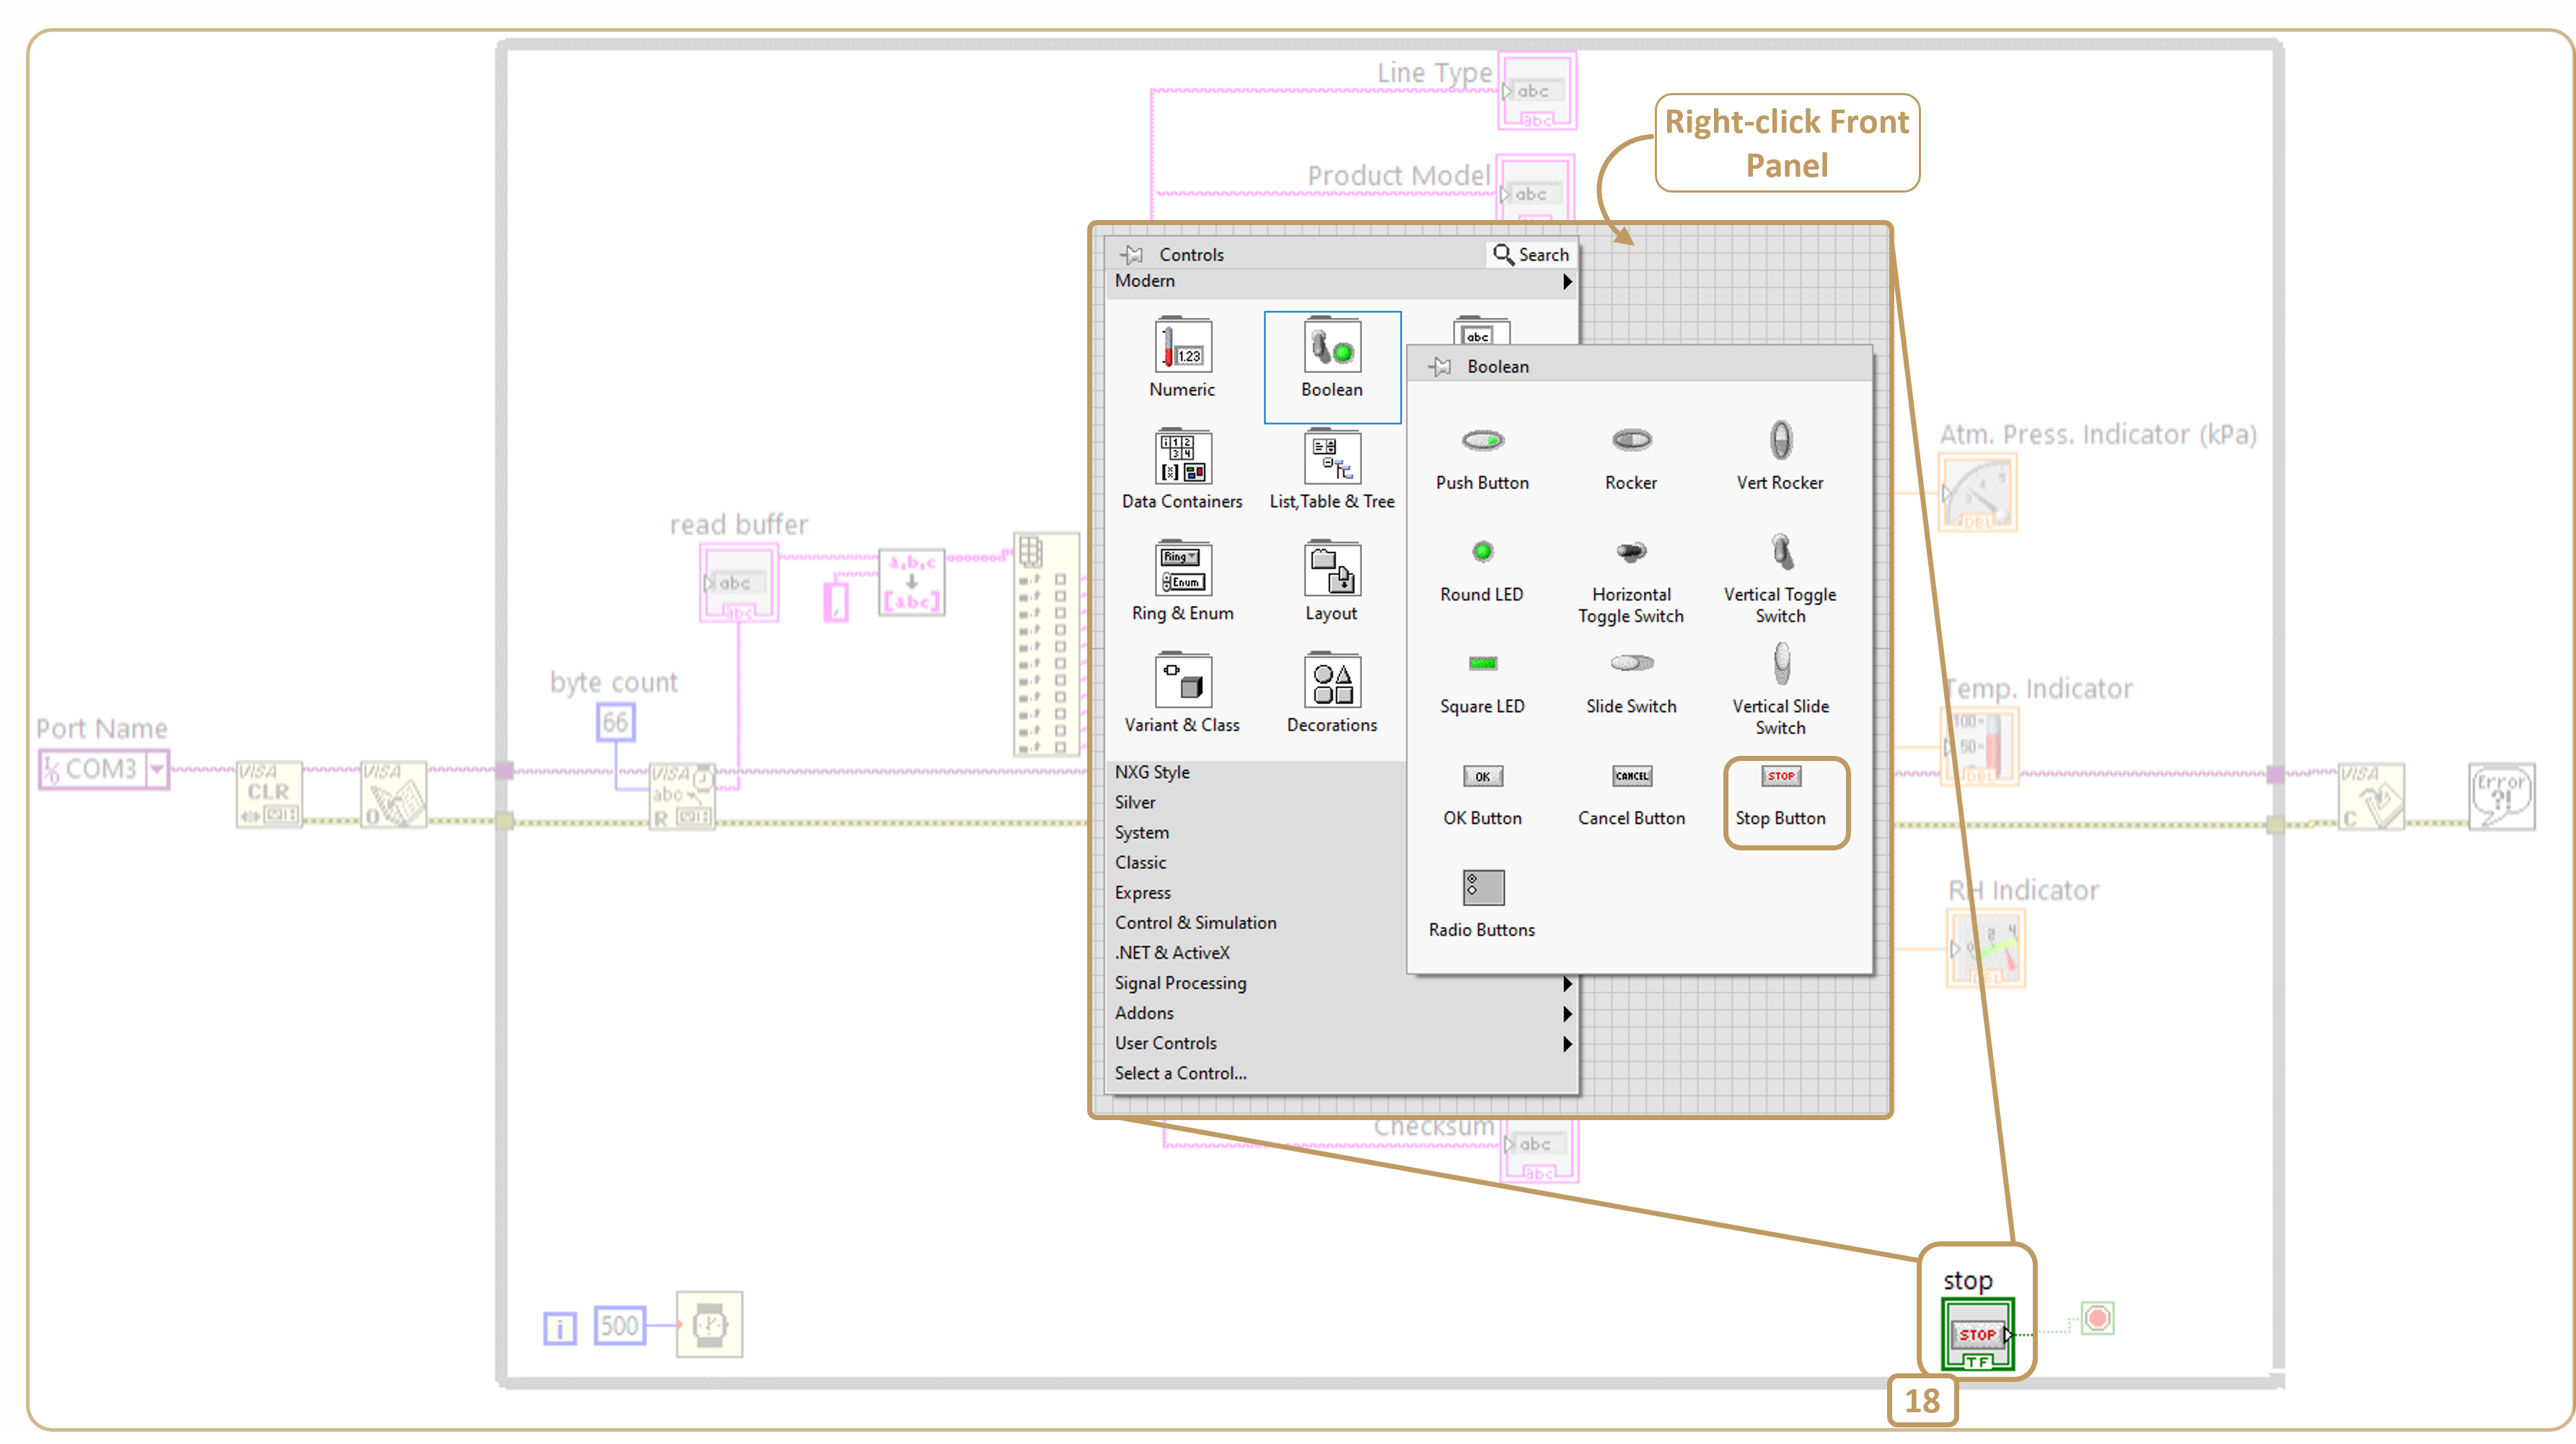
Below, the model is reconstructed in its component parts. Click on a the image of a specific step to enlarge it.
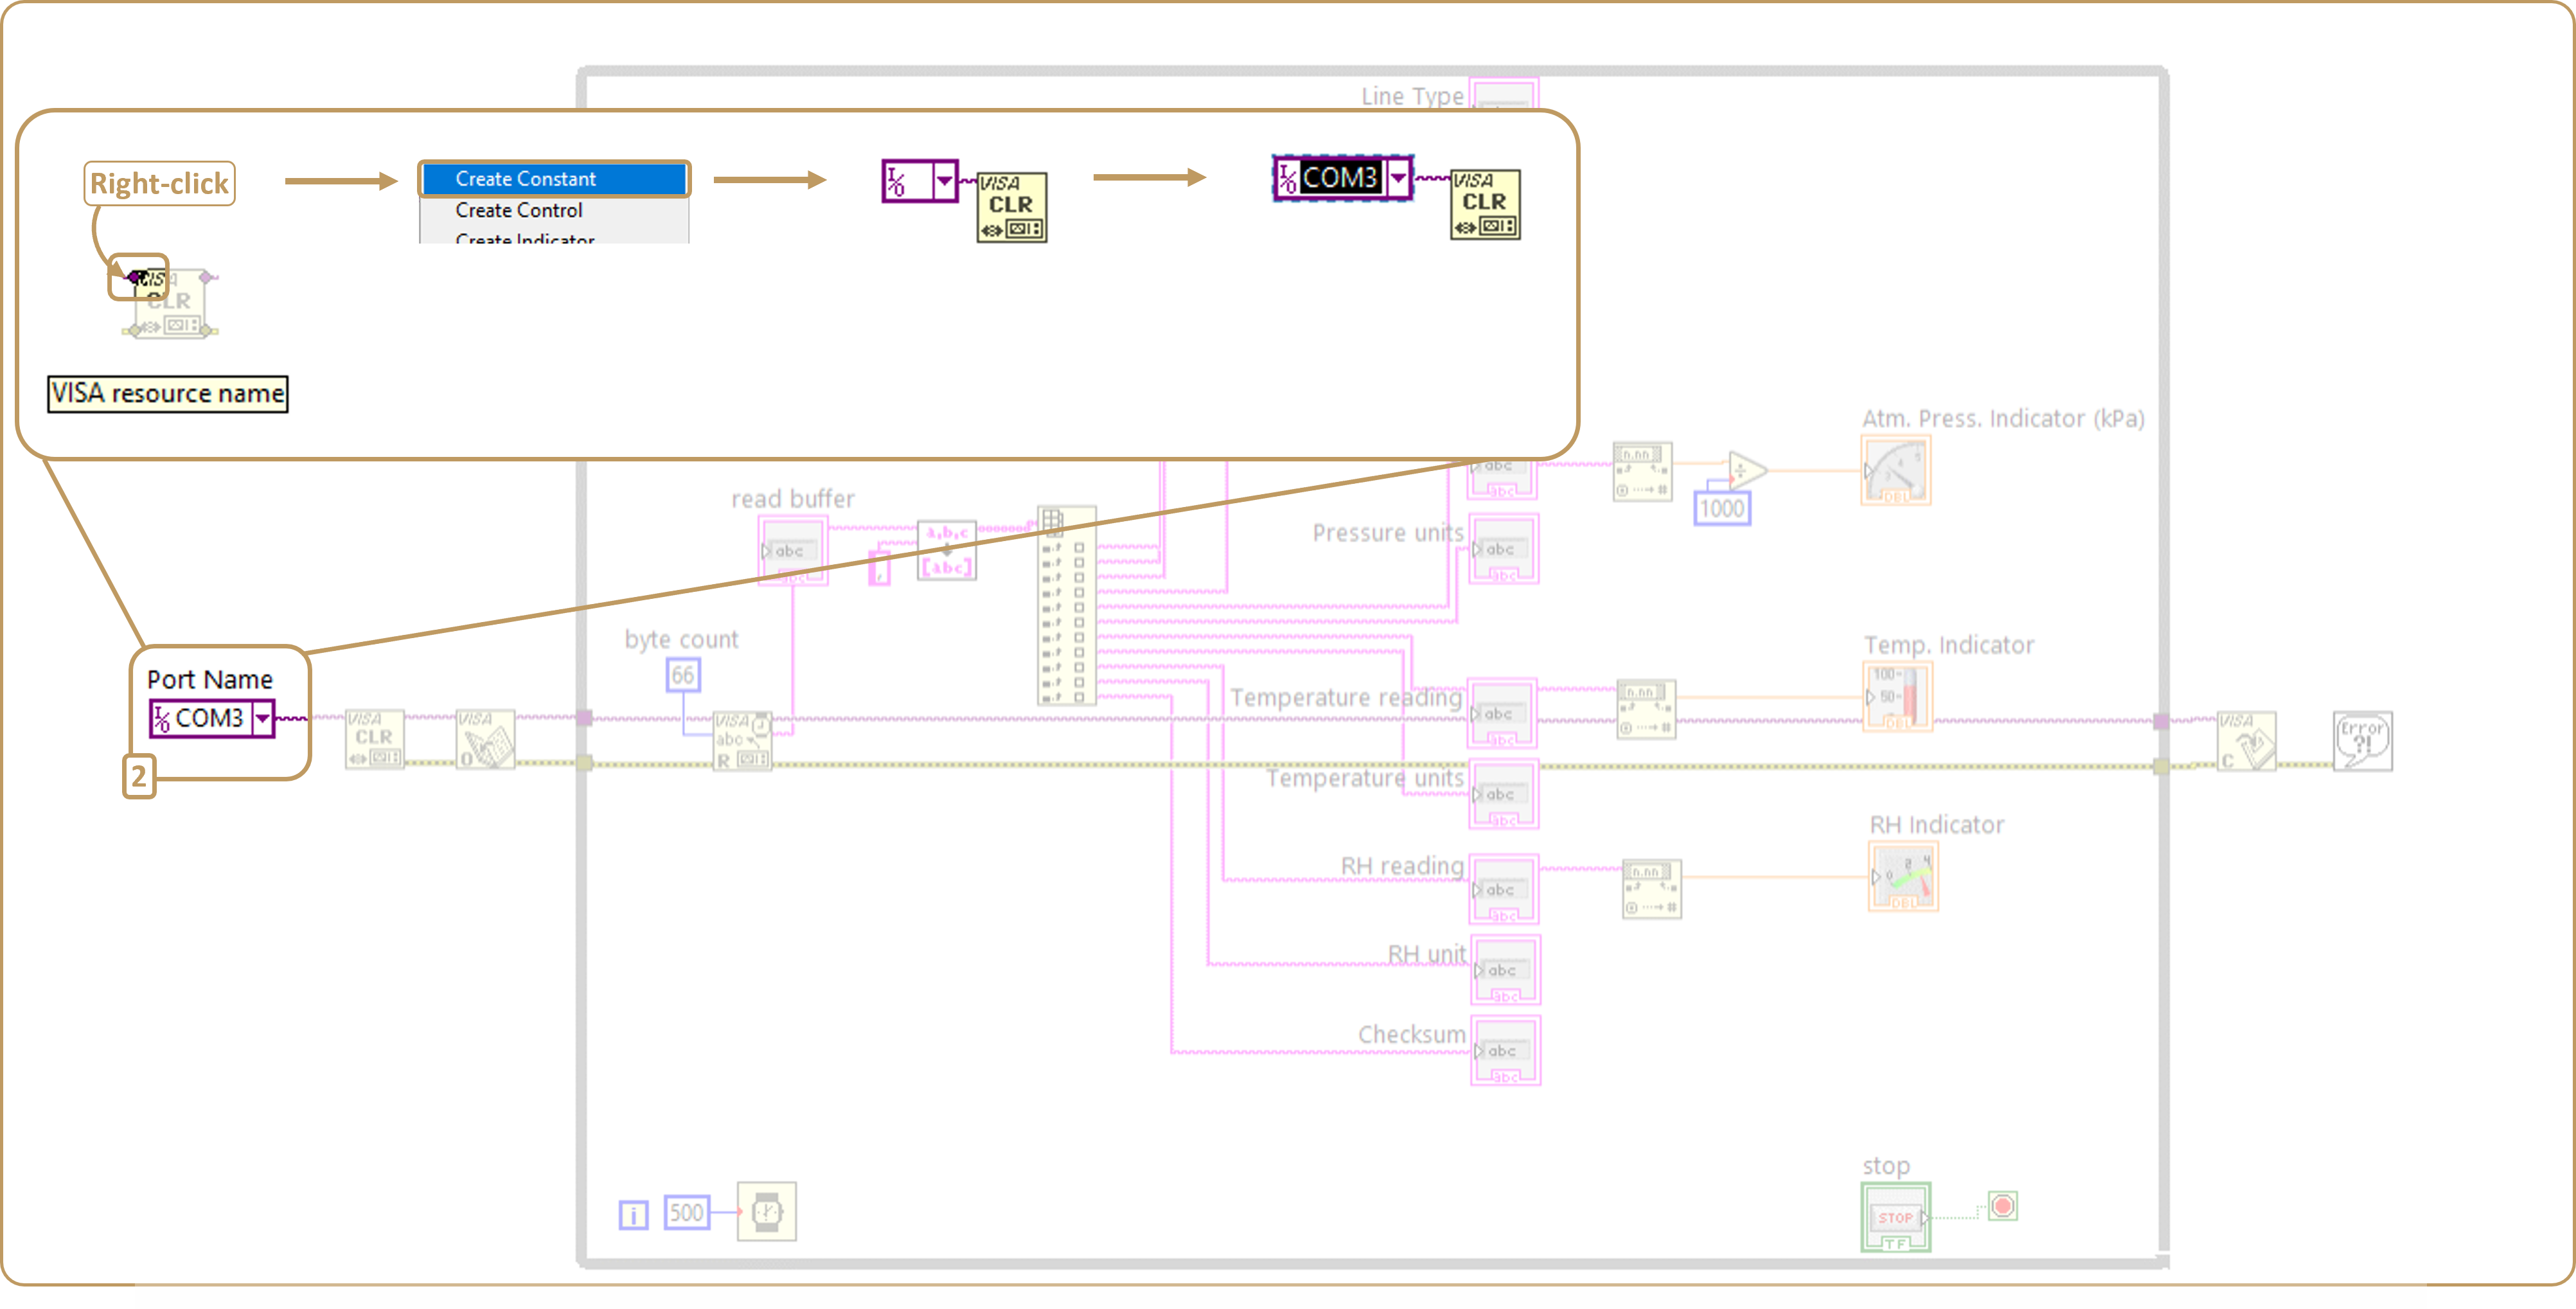
Step 2
Here, we've chosen to make the port identifier constant, so that the program is instantly functional at runtime. Replace “COM3” with your own identifier.
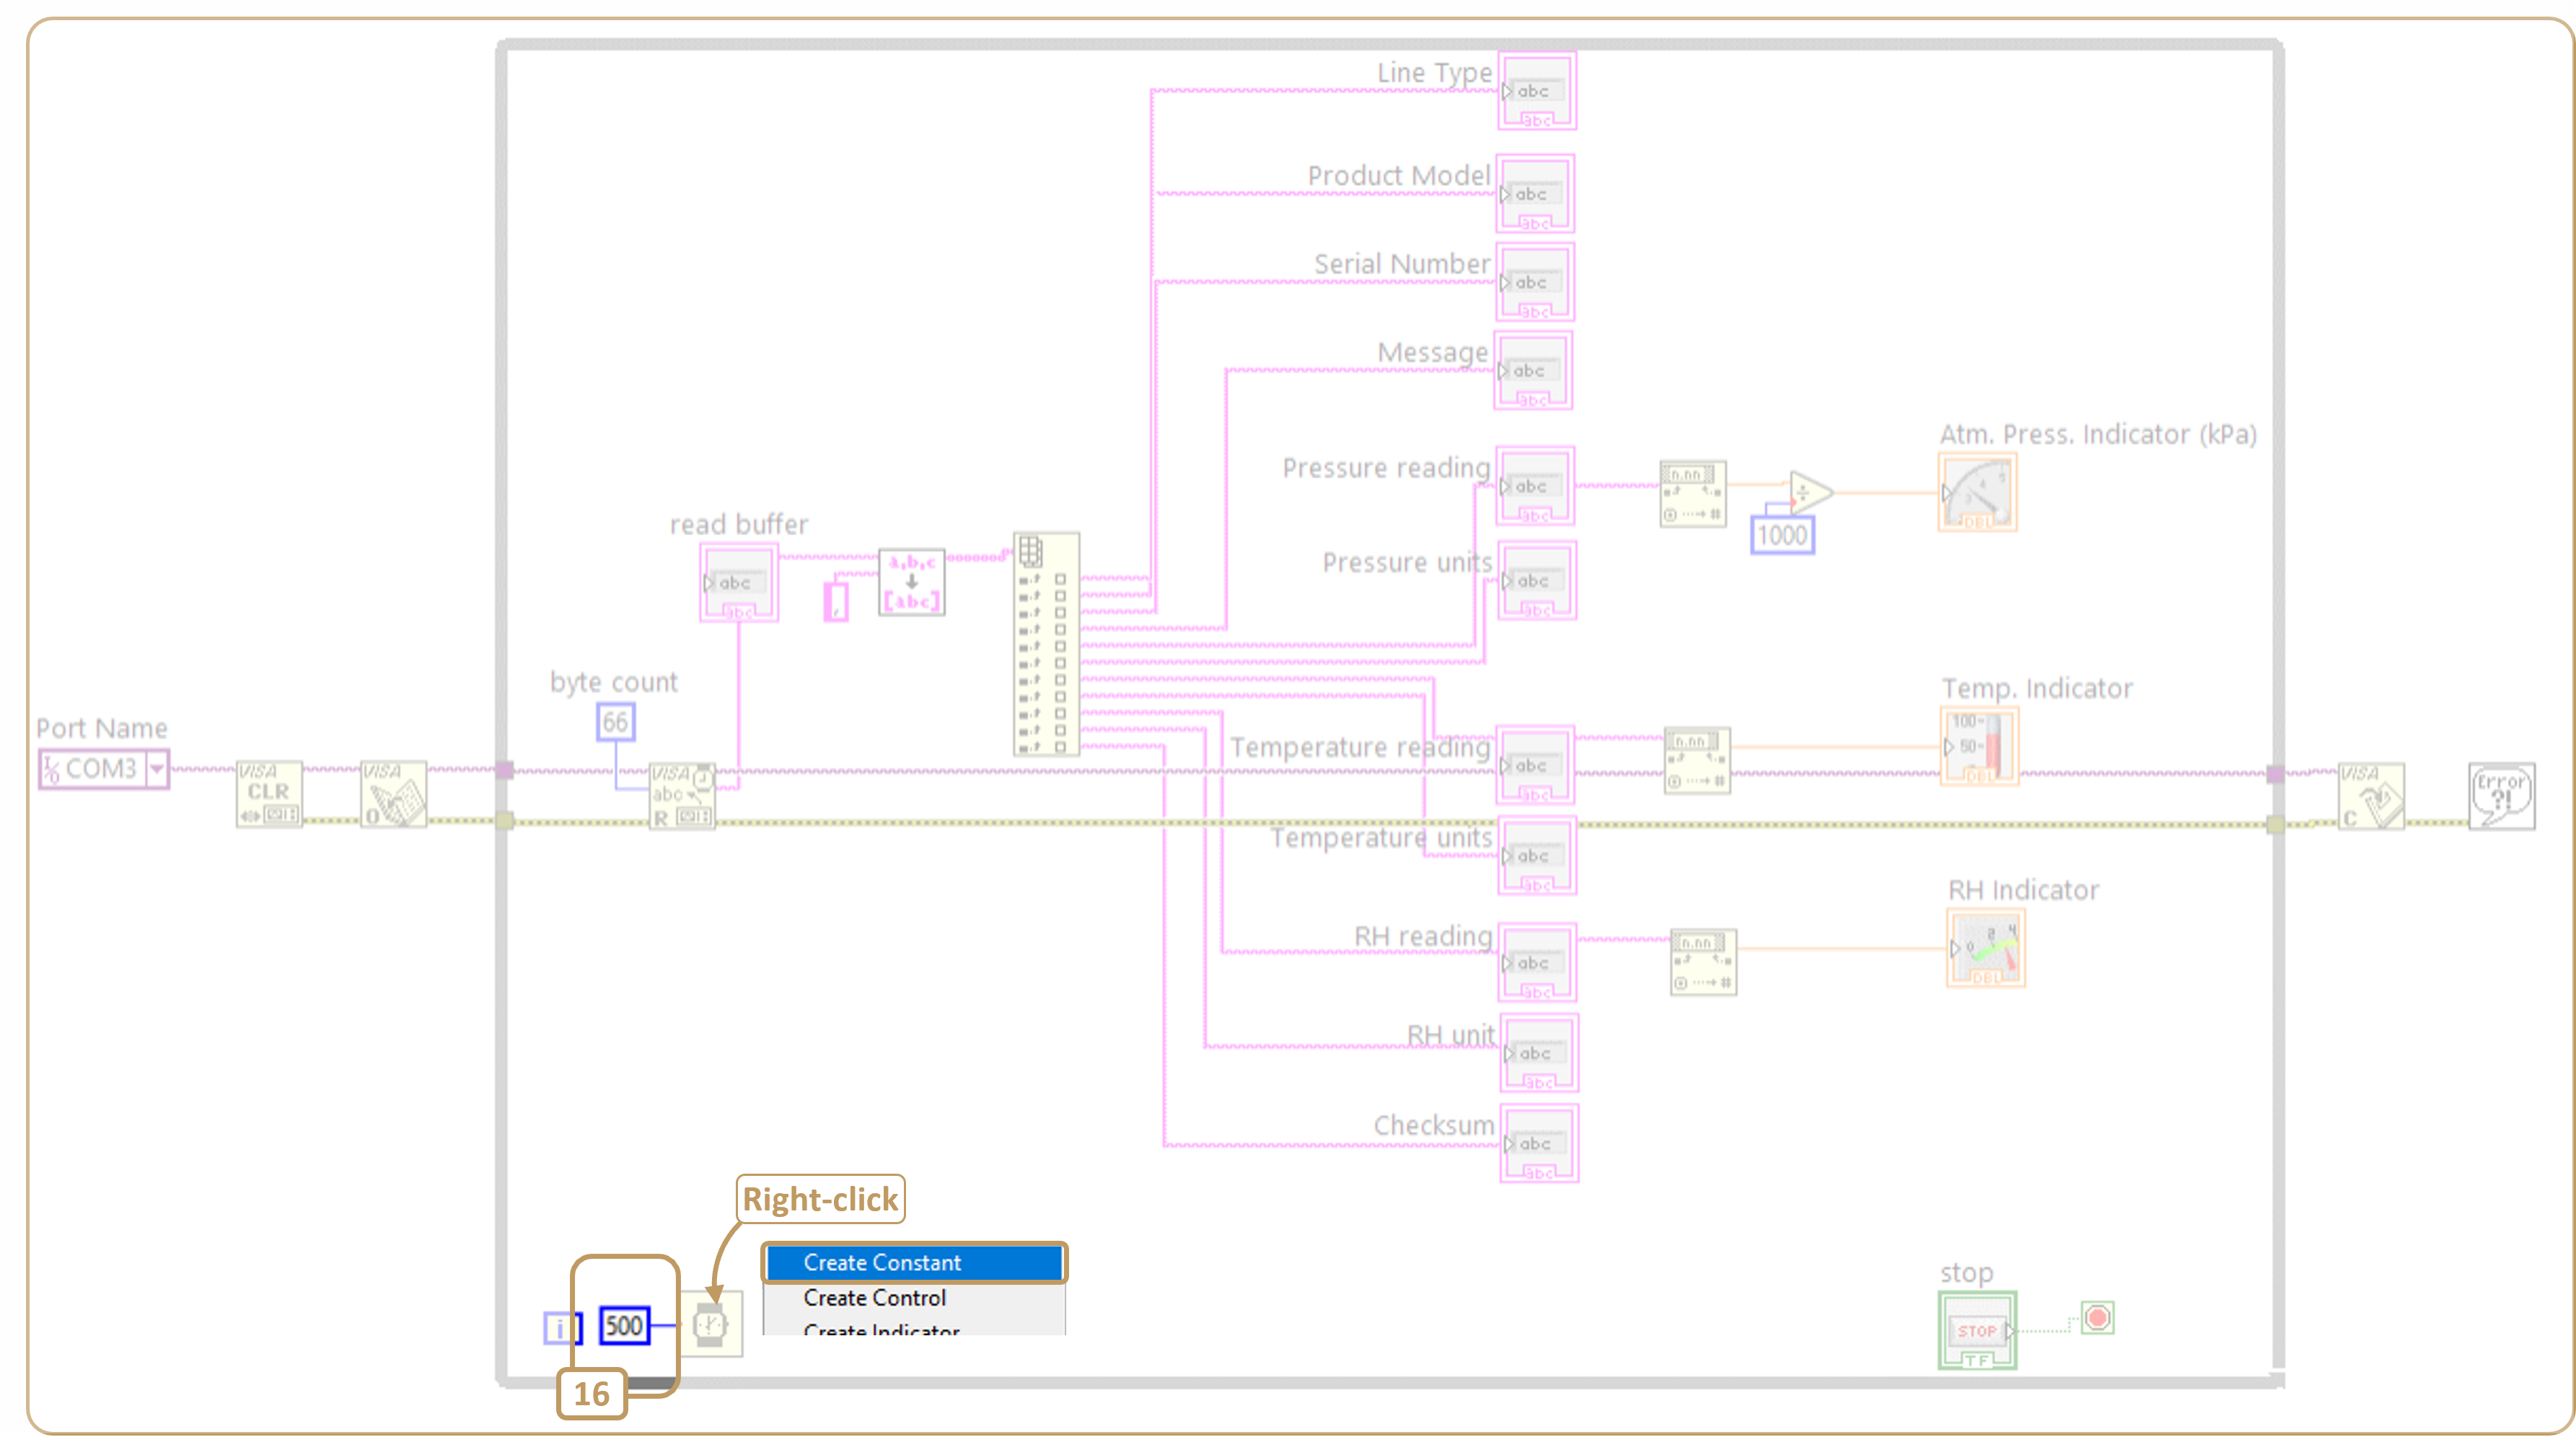
Step 16
Adjust data refresh rate. To modify the polling frequency of the instrument itself, configure it via the POLL command.
5. Other considerations
-
The following points should be taken into account when designing and using LabVIEW:
When disconnecting an instrument communicating via a virtual serial port, LabVIEW may rename it with its own identifier of the form ASR5L::INSTR. The following LabVIEW sub-module was shared with us by a contributor (thanks to J. Hernandez), which addresses the problem of port identification in this situation: SubVI - Dracal - Find USB.vi
LabVIEW is a trademark of National Instruments. Neither Dracal Technologies inc., nor any software programs or other goods or services offered by Dracal Technologies inc., are affiliated with, endorsed by, or sponsored by National Instruments.
